Learning modern JavaScript is tough if you haven’t been there since the beginning. The ecosystem is growing and changing so rapidly that it’s hard to understand the problems that different tools are trying to solve. I started programming in 1998 but only began to learn JavaScript seriously in 2014. At the time I remember coming across Browserify and staring at its tagline:
“Browserify lets you require(‘modules’) in the browser by bundling up all of your dependencies.”
I pretty much didn’t understand any word in this sentence, and struggled to make sense of how this would be helpful for me as a developer.
The goal of this article is to provide a historical context of how JavaScript tools have evolved to what they are today in 2017. We’ll start from the beginning and build an example website like the dinosaurs did — no tools, just plain HTML and JavaScript. Then we’ll introduce different tools incrementally to see the problems that they solve one at a time. With this historical context, you’ll be better able to learn and adapt to the ever-changing JavaScript landscape going forward. Let’s get started!
Using JavaScript the “old-school” way
Let’s start with an “old-school” website using HTML and JavaScript, which involves manually downloading and linking files. Here’s a simple index.htmlfile that links to a JavaScript file:
<!-- index.html -->
<!DOCTYPE html>
<html lang="en">
<head>
  <meta charset="UTF-8">
  <title>JavaScript Example</title>
  <script src="index.js"></script>
</head>
<body>
  <h1>Hello from HTML!</h1>
</body>
</html>
The line <script src="index.js"></script> refers to a separate JavaScript file in the same directory named index.js:
// index.js
console.log("Hello from JavaScript!");
This is all you need to make a website! Now let’s say you wanted to add a library someone else wrote like moment.js (a library which can help format dates in a human readable way). For example, you can use the momentfunction in JavaScript as follows:
moment().startOf('day').fromNow(); // 20 hours agoBut this is only assuming you include moment.js on your website! On the homepage for moment.js you see the following instructions:
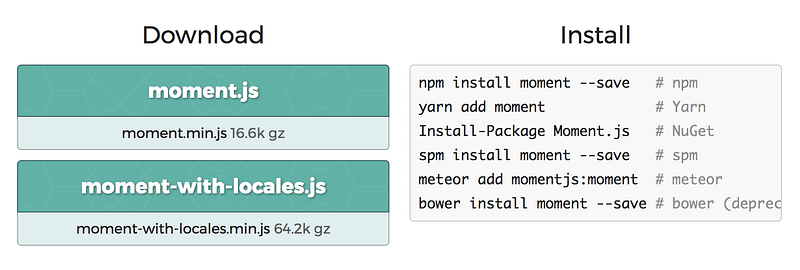
Hmm, there’s a lot of stuff going in the Install section on the right. But let’s ignore that for now — we can add moment.js to our website by downloading the moment.min.js file in the same directory and including it in our index.html file.
<!-- index.html -->
<!DOCTYPE html>
<html lang="en">
<head>
  <meta charset="UTF-8">
  <title>Example</title>
  <link rel="stylesheet" href="index.css">
  <script src="moment.min.js"></script>
  <script src="index.js"></script>
</head>
<body>
  <h1>Hello from HTML!</h1>
</body>
</html>
Note that moment.min.js gets loaded before index.js, which means you can use the moment function in index.js as follows:
// index.js
console.log("Hello from JavaScript!");
console.log(moment().startOf('day').fromNow());
And this is how we used to make websites with JavaScript libraries! The good thing was that it was easy enough to understand. The bad thing was that it was annoying to find and download new versions of libraries every time they would update.
Using a JavaScript package manager (npm)
Starting around 2010, several competing JavaScript package managers emerged to help automate the process of downloading and upgrading libraries from a central repository. Bower was arguably the most popular in 2013, but eventually was overtaken by npm around 2015. (It’s worth noting that starting around late 2016, yarn has picked up a lot of traction as an alternative to npm’s interface, but it still uses npm packages under the hood.)
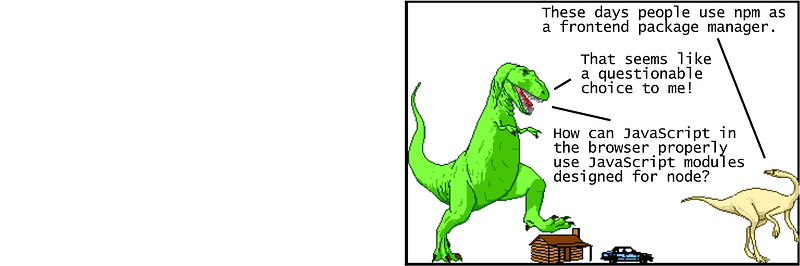
Note that npm was originally a package manager made specifically for node.js, a JavaScript runtime designed to run on the server, not the frontend. So that makes it a pretty weird choice for a frontend JavaScript package manager for libraries meant to run in a browser.
Note: Using package managers generally involves using a command line, which in the past was never required as a frontend dev. If you’ve never used one, you can read this tutorial to get a good overview to get started. For better or for worse, knowing how to use the command line is an important part of modern JavaScript (and it opens up doors in other areas of development as well).
Let’s look at how to use npm to install the moment.js package automatically instead of manually downloading it. If you have node.js installed, you already have npm installed, which means you can navigate your command line to the folder with your index.html file and enter:
$ npm init
This will prompt you with several questions (the defaults are fine, you can hit “Enter” for each question) and generate a new file named package.json. This is a configuration file that npm uses to save all project information. With the defaults the contents of package.json should look something like:
{
  "name": "your-project-name",
  "version": "1.0.0",
  "description": "",
  "main": "index.js",
  "scripts": {
    "test": "echo \"Error: no test specified\" && exit 1"
  },
  "author": "",
  "license": "ISC"
}
To install the moment.js JavaScript package, we can now follow the npm instructions from their home page by entering the following command in the command line:
$ npm install moment --save
This command does two things — first, it downloads all the code from the moment.js package into a folder called node_modules. Second, it automatically modifies the package.json file to keep track of moment.js as a project dependency.
{
  "name": "modern-javascript-example",
  "version": "1.0.0",
  "description": "",
  "main": "index.js",
  "scripts": {
    "test": "echo \"Error: no test specified\" && exit 1"
  },
  "author": "",
  "license": "ISC",
  "dependencies": {
    "moment": "^2.22.2"
  }
}
This is useful later when sharing a project with others — instead of sharing the node_modules folder (which can get very large), you only need to share the package.json file and other developers can install the required packages automatically with the command npm install.
So now we no longer have to manually download moment.js from the website, we can automatically download and update it using npm. Looking inside the node_modules folder, we can see the moment.min.js file in the node_modules/moment/min directory. This means we can link to the npm downloaded version of moment.min.js in the index.html file as follows:
<!-- index.html -->
<!DOCTYPE html>
<html lang="en">
<head>
  <meta charset="UTF-8">
  <title>JavaScript Example</title>
  <script src="node_modules/moment/min/moment.min.js"></script>
  <script src="index.js"></script>
</head>
<body>
  <h1>Hello from HTML!</h1>
</body>
</html>
So the good thing is that we can now use npm to download and update our packages through the command line. The bad thing is right now we’re digging through the node_modules folder to find the location of each package and manually including it in our HTML. That’s pretty inconvenient, so next we’ll take a look at how to automate that process as well.
Using a JavaScript module bundler (webpack)
Most programming languages provide a way to import code from one file into another. JavaScript wasn’t originally designed with this feature, because JavaScript was designed to only run in the browser, with no access to the file system of the client’s computer (for security reasons). So for the longest time, organizing JavaScript code in multiple files required you to load each file with variables shared globally.
This is actually what we’re doing with the above moment.js example — the entire moment.min.js file is loaded in the HTML, which defines a global variable moment, which is then available to any file loaded after moment.min.js (regardless of whether or not it needs access to it).
In 2009, a project named CommonJS was started with the goal of specifying an ecosystem for JavaScript outside the browser. A big part of CommonJS was its specification for modules, which would finally allow JavaScript to import and export code across files like most programming languages, without resorting to global variables. The most well-known of implementation of CommonJS modules is node.js.
As mentioned earlier, node.js is a JavaScript runtime designed to run on the server. Here’s what the earlier example would look like using node.js modules. Instead of loading all of moment.min.js with an HTML script tag, you can load it directly in the JavaScript file as follows:
// index.js
var moment = require('moment');
console.log("Hello from JavaScript!");
console.log(moment().startOf('day').fromNow());
Again, this is how module loading works in node.js, which works great since node.js is a server side language with access to the computer’s file system. Node.js also knows the location of each npm module path, so instead of having to write require('./node_modules/moment/min/moment.min.js), you can simply write require('moment') — pretty sweet.
This is all great for node.js, but if you tried to use the above code in the browser, you’d get an error saying require is not defined. The browser doesn’t have access to the file system, which means loading modules in this way is very tricky — loading files has to be done dynamically, either synchronously (which slows down execution) or asynchronously (which can have timing issues).
This is where a module bundler comes in. A JavaScript module bundler is a tool that gets around the problem with a build step (which has access to the file system) to create a final output that is browser compatible (which doesn’t need access to the file system). In this case, we need a module bundler to find all require statements (which is invalid browser JavaScript syntax) and replace them with the actual contents of each required file. The final result is a single bundled JavaScript file (with no require statements)!
The most popular module bundler was Browserify, which was released in 2011 and pioneered the usage of node.js style require statements on the frontend (which is essentially what enabled npm to become the frontend package manager of choice). Around 2015, webpack eventually became the more widely used module bundler (fueled by the popularity of the Reactfrontend framework, which took full advantage of webpack’s various features).
Let’s take a look at how to use webpack to get the above require('moment')example working in the browser. First we need to install webpack into the project. Webpack itself is an npm package, so we can install it from the command line:
$ npm install webpack webpack-cli --save-dev
Note that we’re installing two packages — webpack and webpack-cli (which enables you to use webpack from the command line). Also note the --save-dev argument — this saves it as a development dependency, which means it’s a package that you need in your development environment but not on your production server. You can see this reflected in the package.json file, which was automatically updated:
{
  "name": "modern-javascript-example",
  "version": "1.0.0",
  "description": "",
  "main": "index.js",
  "scripts": {
    "test": "echo \"Error: no test specified\" && exit 1"
  },
  "author": "",
  "license": "ISC",
  "dependencies": {
    "moment": "^2.19.1"
  },
  "devDependencies": {
    "webpack": "^4.17.1",
    "webpack-cli": "^3.1.0"
  }
}
Now we have webpack and webpack-cli installed as packages in the node_modules folder. You can use webpack-cli from the command line as follows:
$ ./node_modules/.bin/webpack index.js --mode=development
This command will run the webpack tool that was installed in the node_modules folder, start with the index.js file, find any requirestatements, and replace them with the appropriate code to create a single output file (which by default is dist/main.js). The --mode=developmentargument is to keep the JavaScript readable for developers, as opposed to a minified output with the argument --mode=production.
Now that we have webpack’s dist/main.js output, we are going to use it instead of index.js in the browser, as it contains invalid require statements. This would be reflected in the index.html file as follows:
<!-- index.html -->
<!DOCTYPE html>
<html lang="en">
<head>
  <meta charset="UTF-8">
  <title>JavaScript Example</title>
  <script src="dist/main.js"></script>
</head>
<body>
  <h1>Hello from HTML!</h1>
</body>
</html>
If you refresh the browser, you should see that everything is working as before!
Note that we’ll need to run the webpack command each time we change index.js. This is tedious, and will get even more tedious as we use webpack’s more advanced features (like generating source maps to help debug the original code from the transpiled code). Webpack can read options from a config file in the root directory of the project named webpack.config.js, which in our case would look like:
// webpack.config.js
module.exports = {
  mode: 'development',
  entry: './index.js',
  output: {
    filename: 'main.js',
    publicPath: 'dist'
  }
};
Now each time we change index.js, we can run webpack with the command:
$ ./node_modules/.bin/webpack
We don’t need to specify the index.js and --mode=development options anymore, since webpack is loading those options from the webpack.config.jsfile. This is better, but it’s still tedious to enter this command for each code change — we’ll make this process smoother in a bit.
Overall, this may not seem like much, but there are some huge advantages to this workflow. We are no longer loading external scripts via global variables. Any new JavaScript libraries will be added using require statements in the JavaScript, as opposed to adding new <script> tags in the HTML. Having a single JavaScript bundle file is often better for performance. And now that we added a build step, there are some other powerful features we can add to our development workflow!
Transpiling code for new language features (babel)
Transpiling code means converting the code in one language to code in another similar language. This is an important part of frontend development — since browsers are slow to add new features, new languages were created with experimental features that transpile to browser compatible languages.
For CSS, there’s Sass, Less, and Stylus, to name a few. For JavaScript, the most popular transpiler for a while was CoffeeScript (released around 2010), whereas nowadays most people use babel or TypeScript. CoffeeScript is a language focused on improving JavaScript by significantly changing the language — optional parentheses, significant whitespace, etc. Babel is not a new language but a transpiler that transpiles next generation JavaScript with features not yet available to all browsers (ES2015 and beyond) to older more compatible JavaScript (ES5). Typescript is a language that is essentially identical to next generation JavaScript, but also adds optional static typing. Many people choose to use babel because it’s closest to vanilla JavaScript.
Let’s look at an example of how to use babel with our existing webpack build step. First we’ll install babel (which is an npm package) into the project from the command line:
$ npm install @babel/core @babel/preset-env babel-loader --save-dev
Note that we’re installing 3 separate packages as dev dependencies — @babel/core is the main part of babel, @babel/preset-env is a preset defining which new JavaScript features to transpile, and babel-loader is a package to enable babel to work with webpack. We can configure webpack to use babel-loader by editing the webpack.config.js file as follows:
// webpack.config.js
module.exports = {
  mode: 'development',
  entry: './index.js',
  output: {
    filename: 'main.js',
    publicPath: 'dist'
  },
  module: {
    rules: [
      {
        test: /\.js$/,
        exclude: /node_modules/,
        use: {
          loader: 'babel-loader',
          options: {
            presets: ['@babel/preset-env']
          }
        }
      }
    ]
  }
};
This syntax can be confusing (fortunately it’s not something we’ll be editing often). Basically we’re telling webpack to look for any .js files (excluding ones in the node_modules folder) and apply babel transpilation using babel-loader with the @babel/preset-env preset. You can read more about webpack configuration syntax here.
Now that everything’s set up, we can start writing ES2015 features in our JavaScript! Here’s an example of an ES2015 template string in the index.jsfile:
// index.js
var moment = require('moment');
console.log("Hello from JavaScript!");
console.log(moment().startOf('day').fromNow());
var name = "Bob", time = "today";
console.log(`Hello ${name}, how are you ${time}?`);
We can also use the ES2015 import statement instead of require for loading modules, which is what you’ll see in a lot of codebases today:
// index.js
import moment from 'moment';
console.log("Hello from JavaScript!");
console.log(moment().startOf('day').fromNow());
var name = "Bob", time = "today";
console.log(`Hello ${name}, how are you ${time}?`);
In this example, the import syntax isn’t much different from the requiresyntax, but import has extra flexibility for more advanced cases. Since we changed index.js, we need to run webpack again in the command line:
$ ./node_modules/.bin/webpack
Now you can refresh index.html in the browser. At the time of this writing, most modern browsers support all ES2015 features, so it can be hard to tell if babel did its job. You can test it in an older browser like IE9, or you can search in bundle.js to find the line of transpiled code:
// bundle.js
// ...
console.log('Hello ' + name + ', how are you ' + time + '?');
// ...
Here you can see babel transpiled the ES2015 template string into regular JavaScript string concatenation to maintain browser compatibility. While this particular example may not be too exciting, the ability to transpile code is a very powerful one. There are some exciting language features coming to JavaScript like async/await that you can start using today to write better code. And while transpilation may at times seem tedious and painful, it has led to a dramatic improvement of the language in the past few years, as people are testing out tomorrow’s features today.
We’re almost done, but there’s still some unpolished edges in our workflow. If we’re concerned about performance, we should be minifying the bundle file, which should be easy enough since we’re already incorporating a build step. We also need to re-run the webpack command each time we change the JavaScript, which gets old real fast. So the next thing we’ll look at are some convenience tools to solve these issues.
Using a task runner (npm scripts)
Now that we’re invested in using a build step to work with JavaScript modules, it makes sense to use a task runner, which is a tool that automates different parts of the build process. For frontend development, tasks include minifying code, optimizing images, running tests, etc.
In 2013, Grunt was the most popular frontend task runner, with Gulp following shortly after. Both rely on plugins that wrap other command line tools. Nowadays the most popular choice seems to be using the scripting capabilities built into the npm package manager itself, which doesn’t use plugins but instead works with other command line tools directly.
Let’s write some npm scripts to make using webpack easier. This involves simply changing the package.json file as follows:
{
  "name": "modern-javascript-example",
  "version": "1.0.0",
  "description": "",
  "main": "index.js",
  "scripts": {
    "test": "echo \"Error: no test specified\" && exit 1",
    "build": "webpack --progress --mode=production",
    "watch": "webpack --progress --watch"
  },
  "author": "",
  "license": "ISC",
  "dependencies": {
    "moment": "^2.22.2"
  },
  "devDependencies": {
    "@babel/core": "^7.0.0",
    "@babel/preset-env": "^7.0.0",
    "babel-loader": "^8.0.2",
    "webpack": "^4.17.1",
    "webpack-cli": "^3.1.0"
  }
}
Here we’ve added two new scripts, build and watch. To run the build script, you can enter in the command line:
$ npm run build
This will run webpack (using configuration from the webpack.config.js we made earlier) with the --progress option to show the percent progress and the --mode=production option to minimize the code for production. To run the watch script:
$ npm run watch
This uses the --watch option instead to automatically re-run webpack each time any JavaScript file changes, which is great for development.
Note that the scripts in package.json can run webpack without having to specify the full path ./node_modules/.bin/webpack, since node.js knows the location of each npm module path. This is pretty sweet! We can make things even sweeter by installing webpack-dev-server, a separate tool which provides a simple web server with live reloading. To install it as a development dependency, enter the command:
$ npm install webpack-dev-server --save-dev
Then add an npm script to package.json:
{
  "name": "modern-javascript-example",
  "version": "1.0.0",
  "description": "",
  "main": "index.js",
  "scripts": {
    "test": "echo \"Error: no test specified\" && exit 1",
    "build": "webpack --progress -p",
    "watch": "webpack --progress --watch",
    "server": "webpack-dev-server --open"
  },
  "author": "",
  "license": "ISC",
  "dependencies": {
    "moment": "^2.19.1"
  },
  "devDependencies": {
    "@babel/core": "^7.0.0",
    "@babel/preset-env": "^7.0.0",
    "babel-loader": "^8.0.2",
    "webpack": "^3.7.1",
    "webpack-dev-server": "^3.1.6"
  }
}
Now you can start your dev server by running the command:
$ npm run server
This will automatically open the index.html website in your browser with an address of localhost:8080 (by default). Any time you change your JavaScript in index.js, webpack-dev-server will rebuild its own bundled JavaScript and refresh the browser automatically. This is a surprisingly useful time saver, as it allows you to keep your focus on the code instead of having to continually switch contexts between the code and the browser to see new changes.
This is only scratching the surface, there are plenty more options with both webpack and webpack-dev-server (which you can read about here). You can of course make npm scripts for running other tasks as well, such as converting Sass to CSS, compressing images, running tests — anything that has a command line tool is fair game. There are also some great advanced options and tricks with npm scripts themselves — this talk by Kate Hudson is a great place to start:
Conclusion
So this is modern JavaScript in a nutshell. We went from plain HTML and JS to using a package manager to automatically download 3rd party packages, a module bundler to create a single script file, a transpiler to use future JavaScript features, and a task runner to automate different parts of the build process. Definitely a lot of moving pieces here, especially for beginners. Web development used to be a great entry point for people new to programming precisely because it was so easy to get up and running; nowadays it can be quite daunting, especially because the various tools tend to change rapidly.
Still, it’s not as bad as it seems. Things are settling down, particularly with the adoption of the node ecosystem as a viable way to work with the frontend. It’s nice and consistent to use npm as a package manager, node require or import statements for modules, and npm scripts for running tasks. This is a vastly simplified workflow compared to even a year or two ago!
Even better for beginners and experienced developers alike is that frameworks these days often come with tools to make the process easier to get started. Ember has ember-cli, which was hugely influential on Angular’s angular-cli, React’s create-react-app, Vue’s vue-cli, etc. All these tools will set up a project with everything you need — all you need to do is start writing code. However, these tools aren’t magic, they simply set everything up in a consistent and working fashion — you may often get to a point where you need to do some extra configuration with webpack, babel, etc. So it’s still very critical to understand what each piece does as we’ve covered in this article.
Modern JavaScript can definitely be frustrating to work with as it continues to change and evolve at a rapid pace. But even though it may seem at times like re-inventing the wheel, JavaScript’s rapid evolution has helped push innovations such as hot reloading, real-time linting, and time-travel debugging. It’s an exciting time to be a developer, and I hope this information can serve as a roadmap to help you on your journey!

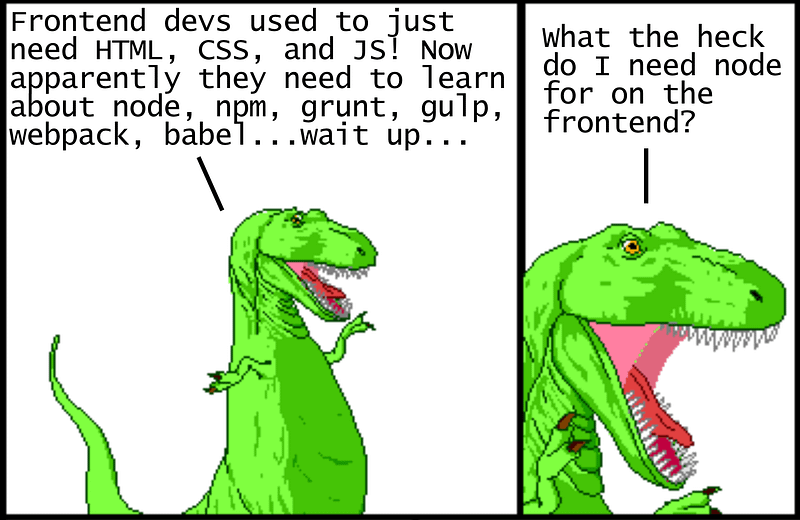
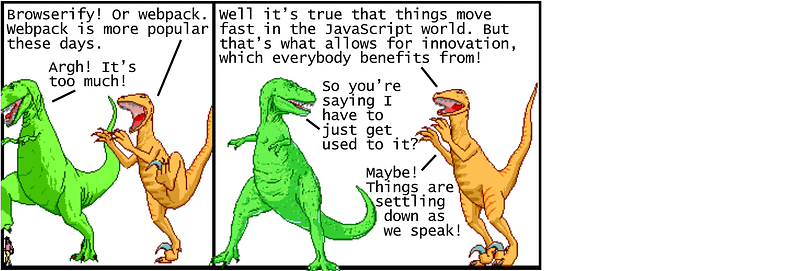
Special thanks to @ryanqnorth’s Dinosaur Comics, which has served up some of the finest absurdist humor since 2003 (when dinosaurs ruled the web).
SOURCE: https://medium.com/the-node-js-collection/modern-javascript-explained-for-dinosaurs-f695e9747b70
Written by
Peter Jang
Dean of Instruction @Actualize. Podcast junkie. Karaoke beast.
Node.js Collection
Community-curated content for the millions of Node.js users.