My previous article Parsing Complex JSON in Flutter got a lot of good reviews by people starting out in Flutter. And one of the top FAQ from the beginners were, “How to do the same with API calls?”
Your wish has been granted, my friend
Let’s work with a simple API that is easily available without any authentication required.
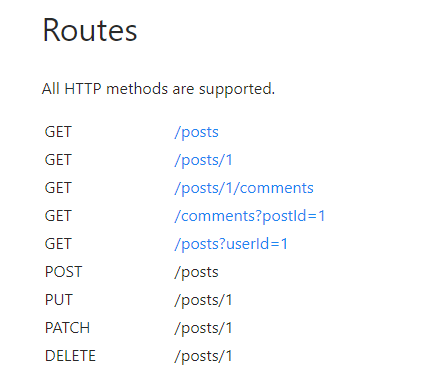
GET : /POSTS/1
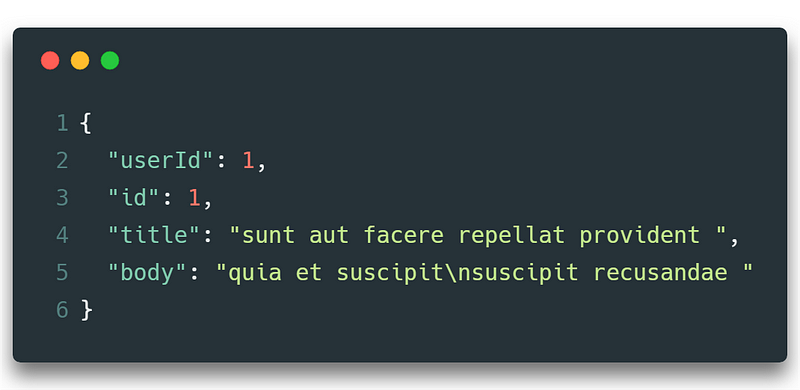
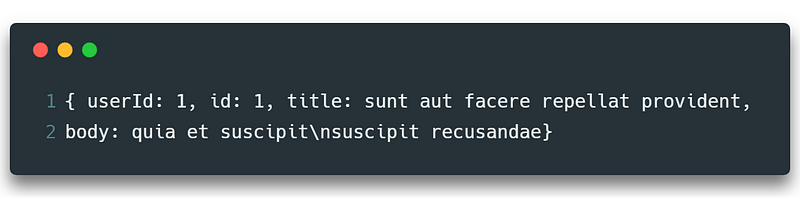
Let’s check how our response would look like when we hit this API endpoint. You can use Postman or just paste this link in your browser. Remember, if you are working with APIs that require authentication and other HTTP headers, it’s recommended to use Postman.
Let’s make a model class for this JSON structure.
Here’s a little tip. You can either use all your knowledge you gained from my Parsing Complex JSON article, or you can save your time by using this little converter tool. I just discovered it recently, and I’m in love. ?
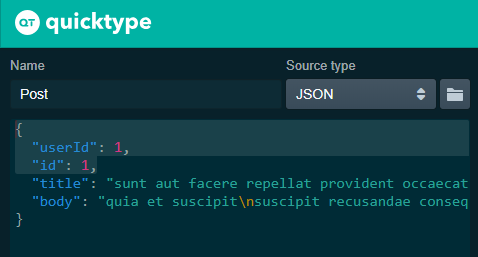
This tool will create your model classes, the factory methods, and the converter methods. Should look like this.
Let’s just focus on our postFromJson method.
Post postFromJson(String str) {
   final jsonData = json.decode(str);
   return Post.fromJson(jsonData);
}
The str is just our JSON string. After decoding str, jsonData looks like this
This is fed into Post.fromJson so that this factory method can create a new Post object for you that you can use in your application.
Hey, why are we sending a Map to the Post.fromJson?
factory Post.fromJson(Map<String, dynamic> json){
   ...
}
Yes. Because Post.fromJson requires an argument of the type Map<String,dynamic>. Duh.

Now let’s call our API
I mostly have the API call methods in a different file, suppose a services.dart
String url = 'https://jsonplaceholder.typicode.com/posts';

Future<Post> getPost() async{
  final response = await http.get('$url/1');
  return postFromJson(response.body);
}
Note: Don’t forget to import the required packages. Check this file for the imports required.
Woman, explain the code!
So till now, we were talking about a JSON string, but we don’t even have it yet. Because we never called the API. So let’s do that work first.
The getPost() method will call the API endpoint which is defined in url. And we will receive a JSON string in response.body, which we have to send to postFromJson so that it can do its conversion magic.
But why is the return type Future<Post> and not Post?

Well, that’s right.
We are doing a network call. So obviously we won’t have a response as soon as we call the API. It will take some time. By definition, A Future is used to represent a potential value, or error, that will be available at some time in the future. Since our response will also be available sometime in the future, we use Futures.
Since we have a network call, we would obviously want an asynchronous way of calling an API. That is where we need async and await. In simple words, async is a keyword that makes your method asynchronous. In an asyncfunction, when we stumble upon await, the following expression is evaluated and the currently running function is suspended until we get our result. In this case, until we get our success or error response.
What about building a UI for the response I got?
Yes, I was getting there. Obviously, if we have our response in the future, the UI depending on the response should also be in the future.
Why?
Because, your UI will be built as soon as the app runs, but you won’t get your API response as soon as your app runs. So if your UI depends on API response values, then it will throw you a lot of null errors.
And to solve this problem, we have…
The Future of Futures : FutureBuilder
Simply put, use a FutureBuilder to build a widget when there are Futures involved. Let’s add the following lines of code in your UI’s build function.
FutureBuilder<Post>(
    future: getPost(),
    builder: (context, snapshot) {
        return Text('${snapshot.data.title}');
    }
)
The FutureBuilder is also a widget, so you can either have it attached to your Scaffold directly, or attach it as a child to any widget you like.
FutureBuilder has two main properties — future and builder. future needs a future and getPost() returns a future.

So future will call the getPost() method, it will do its network call magic and return the result to snapshot of builder. Now simply create whatever widget you like with the result given. Listview? Containers with Text? Really whatever!
Note: Here FutureBuilder has the type <Post> which is also the return type of getPost() . So whatever type is returned by your future function, that should be the type of your FutureBuilder.

Now what if I want a behaviour like this. While I am waiting for the results, I want to show the users a CircularProgressIndicator and as soon as the result is available, show the Text widget.
FutureBuilder makes this easy for you too.
if(snapshot.connectionState == ConnectionState.done)
  return Text('Title from Post JSON : ${snapshot.data.title}');
else
  return CircularProgressIndicator();
And suppose I want to show a particular UI for error situations like No Internet Connection?
if(snapshot.connectionState == ConnectionState.done) {
  if(snapshot.hasError){
    return ErrorWidget();
  }
  return Text('Title from Post JSON : ${snapshot.data.title}');
}
There are other methods like snapshot.hasData and other ConnectionStates like ConnectionState.waiting, ConnectionState.active. I would suggest you to experiment with all of them to build better apps.
POST /posts
Hey, that was a lot of detailed information regarding a GET request. Can you just quickly tell me how to do a POST request?
Sure, in a POST request, the network call method body would look a little different, but otherwise everything’s almost the same.
You would create a model class of your POST request response in the same way. Your FutureBuilder will also be similarly constructed. Let’s see what changes are there in the network call method.
Future<Post> createPost(Post post) async{
  final response = await http.post('$url',
      headers: {
        HttpHeaders.contentTypeHeader: 'application/json'
      },
      body: postToJson(post)
  );
  return postFromJson(response.body);
}
Your http.post will now take 3 parameters → url(API endpoint URL), headers (HTTP Headers; if required) and body (mandatory).
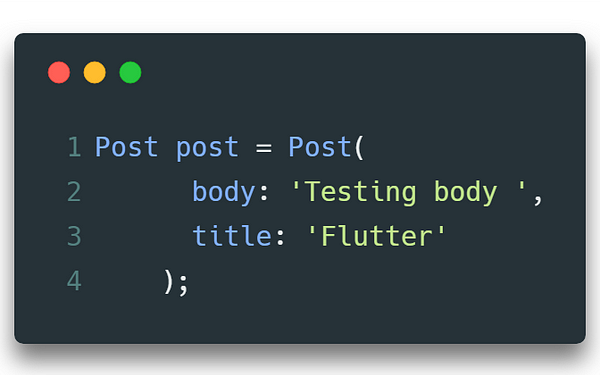
So you might have a post object that looks like this.
The postToJson(post) will convert your post object to a JSON string ready to be sent to server.
Now call the createPostmethod on your FutureBuilder and build your Widget!
But I don’t want to build a UI for this network call
That’s a possible scenario. Like a Login use-case, or just a simple network call that will send some values to server, and return a 200 or 400 statusCode, which is the only thing I would bother about.
So don’t want a FutureBuilder?
Simply use a .then() method then.
createPost(post).then(
(response){

}
)
Call this when you want to call the API. e.g This snippet could be on your onPressed function of your button.
Here, response is the result we get when the createPost has some response. Now we can use this response to do whatever we want. Maybe navigate to another screen.
createPost(post).then((response){
    Navigate.of(context).pushNamed('dashboard');
})
But in this case, it can navigate to another screen even when statusCode is 400, because it returns some response anyway. (Error is also a valid response)
Point. Suppose we want to control our logic on the basis of the success code or error code, we would have to modify the createPost method.
Future<http.Response> createPost(Post post) async{
//same as previous body
  return response;
}
Now the createPost returns a Future of type http.Response. This way we can control a lot of things from our UI.
createPost(post).then((response){
    if(response.statusCode == 200)
      Navigate.of(context).pushNamed('dashboard');
    else
      print(response.statusCode);
})
Check the below GitHub project to run the examples above.
That’ all for you, beginners! But the ocean is vast, keep exploring! Tada!
Did you read my other articles?
This article helped you? Long press on the ? button as long as you can. That motivates me to write more articles for you.
I got something wrong? Mention it in the comments. I would love to improve.
Hello World, I am Pooja Bhaumik. A creative developer and a logical designer. You can find me on Linkedin or stalk me on GitHub or maybe follow me on Twitter? If that’s too social for you, just drop a mail to pbhaumik26@gmail.com if you wish to talk tech with me.
Have a nice fluttery day!
Source: https://medium.com/flutter-community/working-with-apis-in-flutter-8745968103e9
Written by
Poojã Bhaumik
Mobile Developer | Android ❤ Flutter | Udacity Nanodegree Graduate | Final Year CS Undergrad
Flutter Community
Articles and Stories from the Flutter Community