
Disclaimer
Downloading videos from YouTube is against the YouTube Policy. The only videos that your allowed to download is your own which you can already do using YouTube Studio.
Making a YouTube Downloader can look really difficult, but it is not really. Making a YouTube Downloader requires you to know some HTML, JavaScript and Node.js and you should be well enough able to create your very own YouTube downloader.
HTML
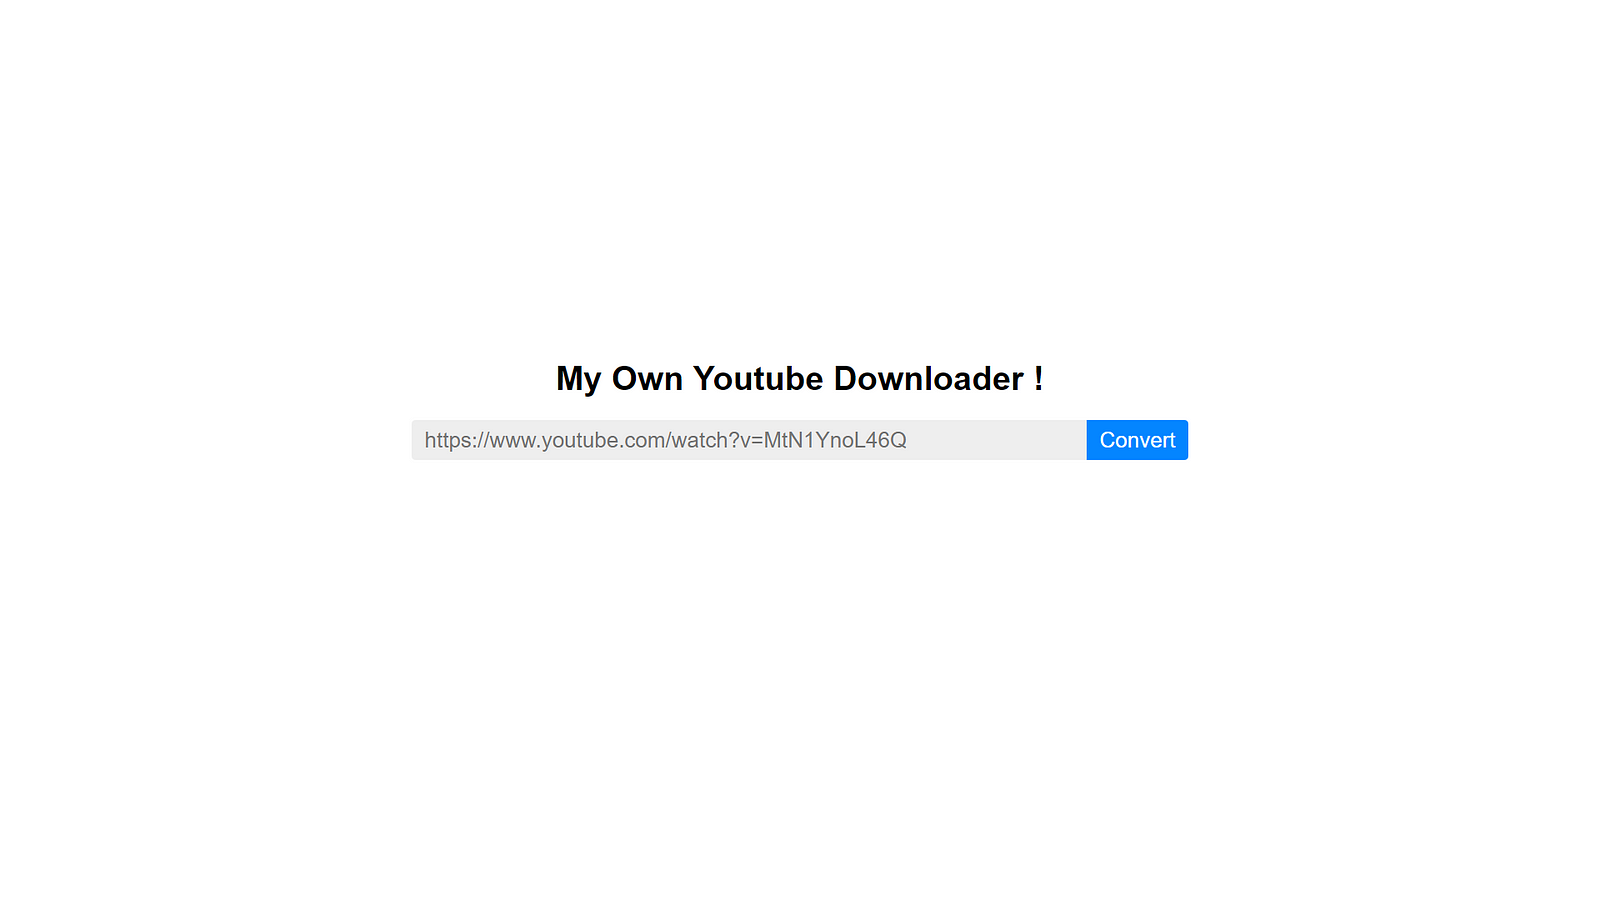
If you are going to have a YouTube downloader you need HTML to create your elements that we are going to use to interact with our website. First, I have created a simple HTML document that has a title, an input and a button. So first create a HTML file named index.html. This is the HTML code for our simple Webpage:
<!DOCTYPE html>
<html>
<head>
    <title>YouTube Downloader</title>
</head>
<body>
    <h1 class="heading">My Own YouTube Downloader !</h1>
    <input class="URL-input" placeholder="Video URL e.g. https://www.youtube.com/watch?v=MtN1YnoL46Q">
    <button class="convert-button">Convert</button>
</body>
</html>
Result:

CSS
After that we will add some styling to our page using CSS. You can use CSS frameworks like Bootstrap or Bulma. So first I linked my CSS file (style.css) by adding the link tag inside the head:
<link rel="stylesheet" href="style.css">
Then in the style.css we can customise our webpage. So here is my simple CSS code for a really simple styling:
* {
    text-align: center;
}
.heading {
    font-family: Arial;
    margin-top:40vh;
}
.URL-input, .convert-button {
    font-size:1.3em;
    padding:5px 10px;
}
.URL-input {
    border-radius:4px 0px 0px 4px;
    width:30em;
    text-align: left;
    border:2px solid #EEEEEE;
    background: #EEEEEE;
    outline:none;
}
.URL-input:focus {
    border:2px solid #0485ff;
}
.convert-button {
    border-radius:0px 4px 4px 0px;
    border:2px solid #0485ff;
    background: #0485ff;
    color:white;
}
JavaScript and Node.js
Then now we need to setup our JavaScript and our Node.js Server. First let’s create a JavaScript file. Let’s call it script.js. Then we are going to link it to our HTML File by adding script tags in the bottom (Very Important)
<script src='script.js'></script>
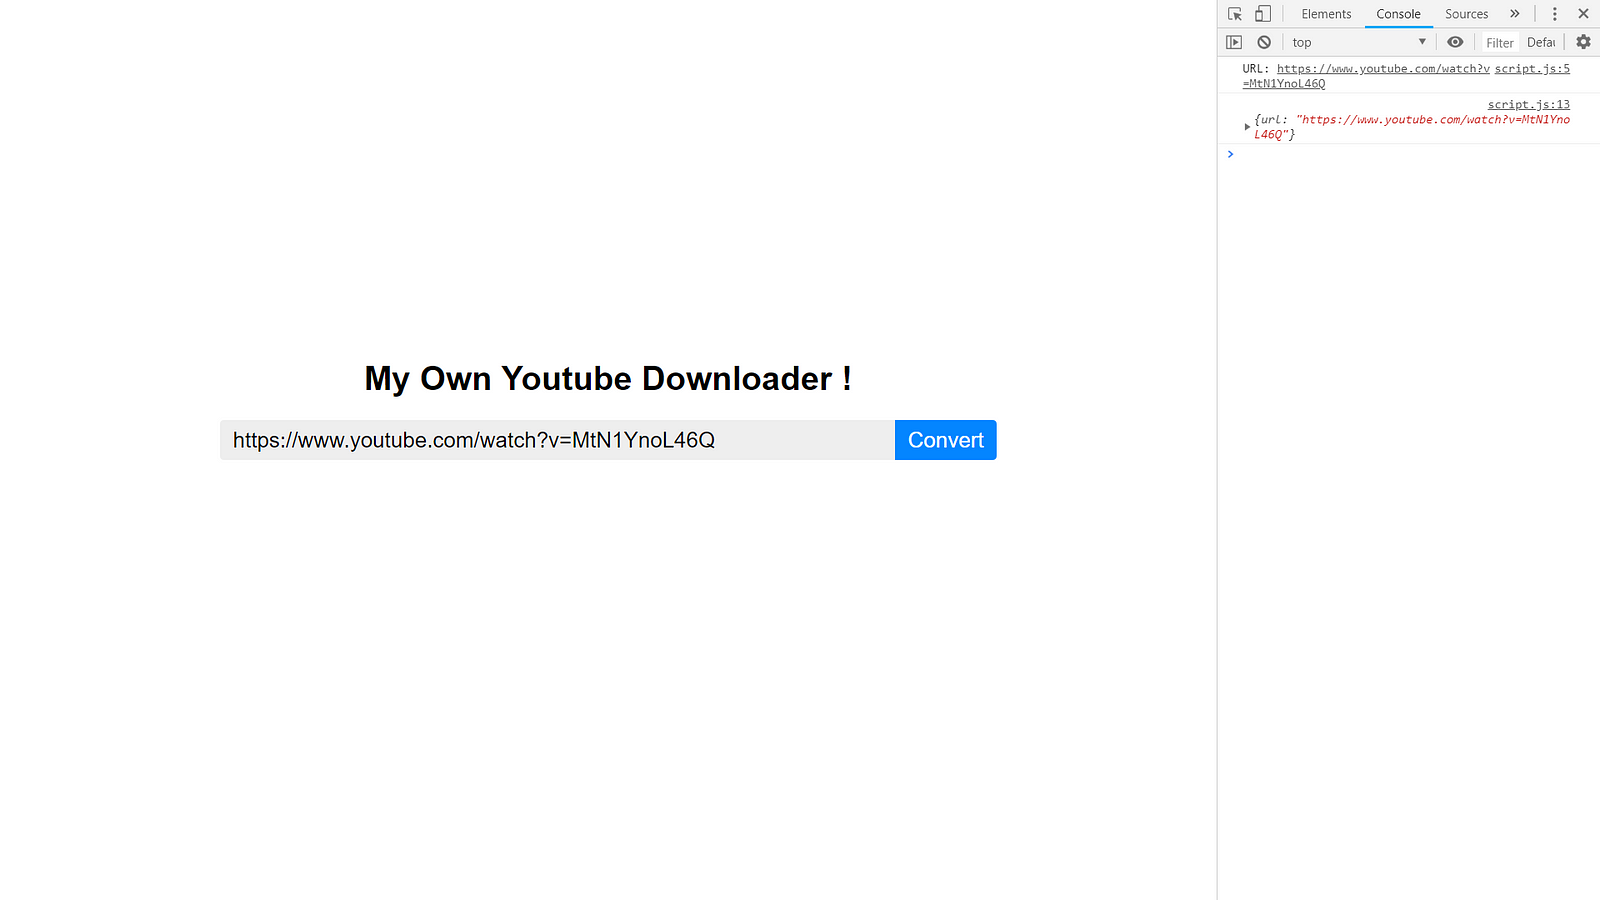
In out script.js file we are going to write that little piece of code output to the console the value of the input. We are doing that to check that everything is working.
var convertBtn = document.querySelector('.convert-button');
var URLinput = document.querySelector('.URL-input');
convertBtn.addEventListener('click', () => {
    console.log(`URL: ${URLinput.value}`);
    sendURL(URLinput.value);
});
function sendURL(URL) {
    // We will put code here later
}
The function sendURL() will send the URL to our server. Now we are going to start writing code for our Server using Node.js. First, we are going to create a folder called Server then create a file called index.js inside the Server folder. This will have the code for the server to run. After creating the file, we need to run this command in the command line or terminal in the Server folder:
npm init
You will be asked a series of questions about the project. All the default responses would be fine. After that we are going to install some packages that we are going to use.
Type the command below to install the required packages which are express, ytdl-core and cors
npm install express cors ytdl-core
To setup our server we need to type some code inside the index.js file. We need to require the packages and setup the server:
const express = require('express');
const cors = require('cors');
const ytdl = require('ytdl-core');
const app = express();
app.listen(4000, () => {
    console.log('Server Works !!! At port 4000');
});
Here is a little Setup. We required the packages and made the server listen on port 4000.
If we type in the command line/terminal:
node index.js
we should see Server Works !!! At port 4000 . If you didn’t get that you have done something wrong.
After that we need to make the server listen for get request on the path /download . So, we added this:
const express = require('express');
const cors = require('cors');
const ytdl = require('ytdl-core');
const app = express();
app.use(cors());
app.listen(4000, () => {
    console.log('Server Works !!! At port 4000');
});
app.get('/download', (req,res) => {
    var URL = req.query.URL;
    res.json({url:URL});
})
so, when the user sends a GET request to the server at the path /downloadthen the server will respond with the query inserted with the request. Let’s go back to the front-end and try to make JavaScript send a GET request to the server. Also, I used the middleware cors() so my server can receive requests. I used fetch() to send the request from JavaScript:
var convertBtn = document.querySelector('.convert-button');
var URLinput = document.querySelector('.URL-input');
convertBtn.addEventListener('click', () => {
    console.log(`URL: ${URLinput.value}`);
    sendURL(URLinput.value);
});
function sendURL(URL) {
    fetch(`http://localhost:4000/download?URL=${URL}`, {
        method:'GET'
    }).then(res => res.json())
    .then(json => console.log(json));
}
So, we can see if we click on the button, we get a response back from the server with the URL that we send. Now we need to use ytdl-core which stand for YouTube DownLoader core which will download the video for us. Let’s go back to index.js. We are going to make it download the video then send it:
const express = require('express');
const cors = require('cors');
const ytdl = require('ytdl-core');
const app = express();
app.use(cors());
app.listen(4000, () => {
    console.log('Server Works !!! At port 4000');
});
app.get('/download', (req,res) => {
var URL = req.query.URL;
res.header('Content-Disposition', 'attachment; filename="video.mp4"');
ytdl(URL, {
    format: 'mp4'
    }).pipe(res);
});
Basically, what is it doing is that when the user send a GET request it take the query given in the URL then adds a header that says any attachment sent needs to be called video.mp4. then use ytdl to download the video with format mp4 then pipe it (send it) to the user to download.
When you run this and test it, you will quickly find out that it doesn’t work. That is because the request needs to be in the URL rather than as a fetch. So, we can basically replace the fetch with a redirect to the URL to download the video.
var convertBtn = document.querySelector('.convert-button');
var URLinput = document.querySelector('.URL-input');
convertBtn.addEventListener('click', () => {
    console.log(`URL: ${URLinput.value}`);
    sendURL(URLinput.value);
});
function sendURL(URL) {
    window.location.href = `http://localhost:4000/download?URL=${URL}`;
}
and Now you will have your very own YouTube Downloader. You can also play around with the ytdl-core and try to add .mp3 or .flv formats. You can also do what I done before which is linking the YouTube Data API with your web application. Possibly Searching for a video then downloading it.
ytdl-core
ytdl-core is a module that can be installed in your node project. It allows you to download youtube videos. This awsome module was made by a person called fent. It has a lot of features which are great like ytdl.videoInfo which gives you different information about a video. I have use this feature to create a youtube downloader where you can search for the video or put the link in to download the video. ytdl-core can be used for all different purposes. Let me give you an example. If you want your website to have your video that you uploaded to youtube and you also don’t want it to be blocked in places where youtube is blocked like Schools. Then you can use ytdl-core to download your own video and use it. ytdl also allows you to validate Youtube URLs and validate Youtube video IDs
[This Project Files on GitHub]
— Thank you for reading. —
— Tell me your thoughts in the comments —
Written by
Moorad Altamimi
I’m a young programmer that does programming for fun. I know a thing or two in Python, HTML, CSS, JavaScript and Node.js. My Website: mooradal.github.io
Noteworthy – The Journal Blog
The official Journal blog