
I’ve been a fan of code once, release many development platforms like Cordova (and associated app frameworks, like Ionic) as well as Xamarin. I’ve been keeping an eye on Flutter, Google’s entry into the fray. Recently they hit their 1.0 release and I decided to give it a spin. I was a bit apprehensive diving in as Flutter apps are written in Dart (of which I have little experience), but I was encouraged by Google’s statement:
You don’t need previous experience with Dart or mobile programming.
With that statement in mind, I decided to recreate an app I previously wrote using Ionic + Firebase + Google Cloud Vision. If you’d like to check that out, the tutorial is available as well as the source code.
In this tutorial we will build an app that takes pictures of items, uses ML Vision to label the items, and saves the image and labels to Firebase Cloud Firestore and Storage. If you’d like to skip to the source code it’s available here. Here is a video of the finished product:
Here we go! I followed the installation instructions provided for MacOS. While not as easy as a brew or npm install, I got through it with ease. Be sure to run flutter doctor and follow the instructions to install any missing dependencies.
My editor of choice is VS Code which fortunately has both Flutter and Dart plugins available. Running Flutter: Run Flutter Doctor prompted me to point to where my Flutter SDK was installed, then I was all set to start writing my app!
First step is to create a new project using the handy VS Code commands outlined here. Seconds later the project is setup including both the iOS and Android platform specific files. Coming from my experience with Cordova I found this quiet surprising as adding a single platform is a separate (and sometimes lengthy) process.
At this point we are ready to run the app. I don’t have any simulators (iOS) or emulators (Android) running at this point so I tap No Devices in the VS Code status bar and click iOS device which automatically launches an iPhone XR simulator. Back in VS Code I hit F5 and 16.2 seconds later the app is running in debug mode on the simulator. Fast! Per the tutorial I change the text and save main.dart which kicks off a hot reload. 1.5 seconds later I see the next text on the screen. Fast!
Like my previous app and tutorial, Flutter Vision is going to take a picture of an item, analyze the picture using ML Kit for Firebase on the device, then store the data in Firebase Cloud Firestore.
First, we need to be able to invoke the camera and save the image file after the user takes a picture. The camera plugin installation instructions are here. Be sure to make the platform specific changes outlined here. After looking at a simple sample and a more complex example I updated my app to simply show a camera preview along with a button to take a picture. After taking the picture the filename and path is shown via a toast. It’s a bit long to paste here, so check out the gist for the source. It’s best to test with an actual device since we are using the camera. Connect a device to your machine and you should see it listed in VS Code’s status bar. Hit F5 to kick off a build and debug session. Note: I was prompted to select a Team in Xcode — after selecting one I had the app running on my phone. Step one complete!
Next up we need a way to use Firebase ML Kit. After a quick search I see that Google has Firebase Flutter plugins — FlutterFire! To use Firebase services we need to first create a Firebase project. There is a great tutorial here that explains how to get this done. Next, we need to closely follow the steps outlined to handle the platform-specific configurations. Now that we have a Firebase project and have setup our platforms, we can start using Firebase ML Kit. Let’s add ML Kit to our app by following the installation instructions. For a quick test, let’s create a function to handle label detection and iterate through the list of labels returned by ML Vision and display them to the user. We will make this more useful later.
Future<void> detectLabels() async {
final FirebaseVisionImage visionImage = FirebaseVisionImage.fromFilePath(imagePath);
final LabelDetector labelDetector = FirebaseVision.instance.labelDetector();
final List<Label> labels = await labelDetector.detectInImage(visionImage);
for (Label label in labels) {
final String text = label.label;
_scaffoldKey.currentState.showSnackBar(SnackBar(content: Text(text)));
}
}
Full gist of changes here. Let’s fire up the app again by hitting F5. It works! See it in action:
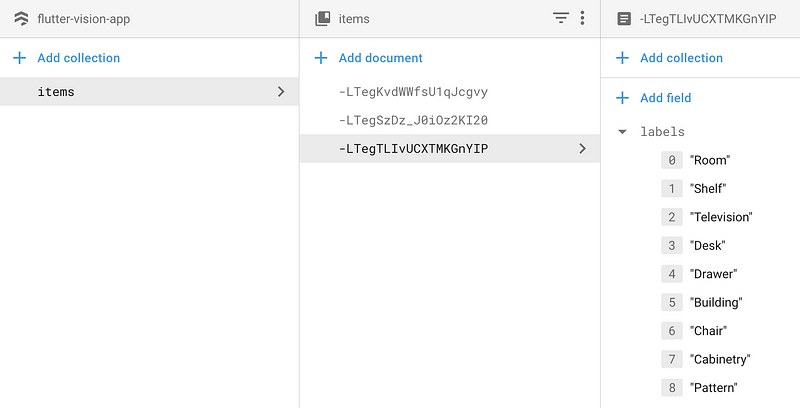
Next we are going to save the image and label data to Firestore. Last time around we used Firebase’s Realtime Database — since then Firebase has released Firestore, a feature rich NoSQL datastore. To setup your Firestore database follow the instructions here, choosing Test Mode for the purposes of dev/test. Remember that this leaves you wide open, so be sure to lock it down with security rules before going to Production. Back to the code — Flutter has a plugin available here which we will install. Next, after we take a picture and analyze it, let’s store it as a document that we will call an item. Multiple documents will be organized into a collection that we will call items. Create a function that will create a new item:
Future<void> _addItem(List<String> labels) async {
await Firestore.instance.collection('items').add(<String, dynamic> {
'labels': labels
});
}
Then change our label detection process to call this new function:
Future<void> detectLabels() async {
final FirebaseVisionImage visionImage = FirebaseVisionImage.fromFilePath(imagePath);
final LabelDetector labelDetector = FirebaseVision.instance.labelDetector();
final List<Label> labels = await labelDetector.detectInImage(visionImage);
List<String> labelTexts = new List();
for (Label label in labels) {
final String text = label.label;
labelTexts.add(text);
}
_addItem(labelTexts);
}
Now when we take pictures we can see items in our collection being added extremely fast. To be clear, this is taking a picture, analyzing the picture for labels using ML Vision, then saving it to a cloud database. Seriously, this is mind-boggling fast:
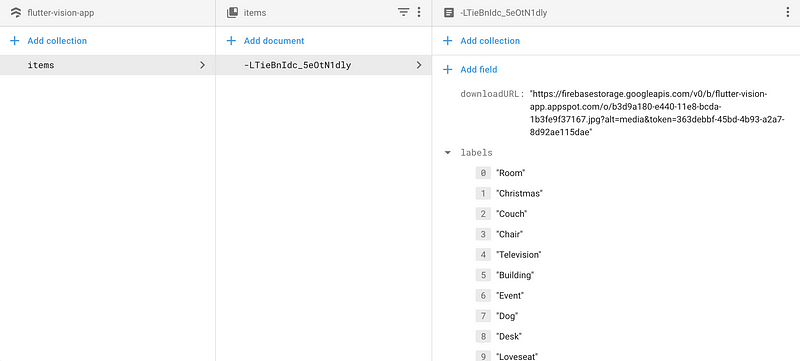
Now we need to store our images. In the previous app, we base64 encoded the image data and stored it directly in Firebase’s Realtime Database. We won’t be able to store image data in Cloud Firestore due to datatype restrictions. No worries, we will store the image file in Firebase Storage then get the URL and store in the item document using the Firebase Storage plugin. Here is our function to handle the uploads. It uploads the file then awaits the StorageUploadTask and grabs the downloadURL:
Future<String> _uploadFile(filename) async {
final File file = File(imagePath);
final StorageReference ref = FirebaseStorage.instance.ref().child('$filename.jpg');
final StorageUploadTask uploadTask = ref.putFile(file, StorageMetadata(contentLanguage: 'en'));
final downloadURL = await (await uploadTask.onComplete).ref.getDownloadURL();
return downloadURL.toString();
}
Update our _addItem function to save the URL:
Future<void> _addItem(String downloadURL, List<String> labels) async {
await Firestore.instance.collection('items').add(<String, dynamic> {
'downloadURL': downloadURL,
'labels': labels
});
}
We need a unique URL, so we will use the handy uuid package like the example:
Future<void> detectLabels() async {
final FirebaseVisionImage visionImage = FirebaseVisionImage.fromFilePath(imagePath);
final LabelDetector labelDetector = FirebaseVision.instance.labelDetector();
final List<Label> labels = await labelDetector.detectInImage(visionImage);
List<String> labelTexts = new List();
for (Label label in labels) {
final String text = label.label;
labelTexts.add(text);
}
final String uuid = Uuid().v1();
final String downloadURL = await _uploadFile(uuid);
_addItem(downloadURL, labelTexts);
}
F5 again to try it out:
At this point our image and data is stored in Firebase. Next we need to display the list of images with labels to the user. We are going to restructure our app to have 2 screens: one that is responsible for displaying a list of images and labels to the user; another that takes a picture and kicks off the ML Vision process. Let’s create a new screen, ItemListScreen, to display a list of cards. I’m going to adapt the examples here and here to fit our needs:
class ItemsListScreen extends StatelessWidget {
@override
Widget build(BuildContext context) {
return Scaffold(
appBar: AppBar(
title: const Text('My Items'),
),
body: ItemsList(firestore: Firestore.instance),
floatingActionButton: FloatingActionButton(
onPressed: () {
Navigator.push(
context,
MaterialPageRoute(builder: (context) => CameraScreen()),
);
},
child: const Icon(Icons.add),
),
);
}
}
…and an ItemsList widget (sorry for the formatting, available in a gist here):
class ItemsList extends StatelessWidget {
ItemsList({this.firestore});
final Firestore firestore;
@override
Widget build(BuildContext context) {
return StreamBuilder<QuerySnapshot>(
stream: firestore.collection('items').snapshots(),
builder: (BuildContext context, AsyncSnapshot<QuerySnapshot> snapshot) {
if (!snapshot.hasData) return const Text('Loading...');
final int itemsCount = snapshot.data.documents.length;
return ListView.builder(
itemCount: itemsCount,
itemBuilder: (_, int index) {
final DocumentSnapshot document = snapshot.data.documents[index];
return SafeArea(
top: false,
bottom: false,
child: Container(
padding: const EdgeInsets.all(8.0),
height: 310.0,
child: Card(
shape: RoundedRectangleBorder(
borderRadius: BorderRadius.only(
topLeft: Radius.circular(16.0),
topRight: Radius.circular(16.0),
bottomLeft: Radius.circular(16.0),
bottomRight: Radius.circular(16.0),
),
),
child: Column(
crossAxisAlignment: CrossAxisAlignment.start,
children: <Widget>[
// photo and title
SizedBox(
height: 184.0,
child: Stack(
children: <Widget>[
Positioned.fill(
child: Image.network(
document['downloadURL']
),
),
],
),
),
Expanded(
child: Padding(
padding: const EdgeInsets.fromLTRB(16.0, 16.0, 16.0, 0.0),
child: DefaultTextStyle(
softWrap: true,
//overflow: TextOverflow.,
style: Theme.of(context).textTheme.subhead,
child: Column(
crossAxisAlignment: CrossAxisAlignment.start,
children: <Widget>[
Text(document['labels'].join(', ')),
]
),
),
),
),
],
),
),
),
);
},
);
},
);
}
}
Let’s change the home screen to the ItemsListScreen:
class FlutterVisionApp extends StatelessWidget {
@override
Widget build(BuildContext context) {
return MaterialApp(
home: ItemsListScreen(),
);
}
}
We should also take the user back to the list after they take a picture so they can see the results by adding the following to the detectLabels function:
Navigator.push(
context,
MaterialPageRoute(builder: (context) => ItemsListScreen()),
);
I also decided to do some cleanup by renaming FlutterVisionHome to CameraScreen since we now have more than one screen.
Run the app one last time to see the final results! Firebase ML Vision is crazyfast. Paired with Flutter we were able to get a snappy app that we can run on both iOS and Android in hours, not days. Incredible. If you were like me and hesitant to try Flutter because you didn’t know Dart — give it a go today!
The source code is available here. Feel free to open an issue there if you run into trouble or hit me up in the comments. Thanks for listening!
Written by
Google Cloud Platform – Community
A collection of technical articles published or curated by Google Cloud Platform Developer Advocates. The views expressed are those of the authors and don’t necessarily reflect those of Google.