
Today we’re going to look at navigation in Flutter.
But not just any boring navigation. ?
No, ladies and gentlemen, we’re going to make this interesting.
Here’s an app with a BottomNavigationBar:
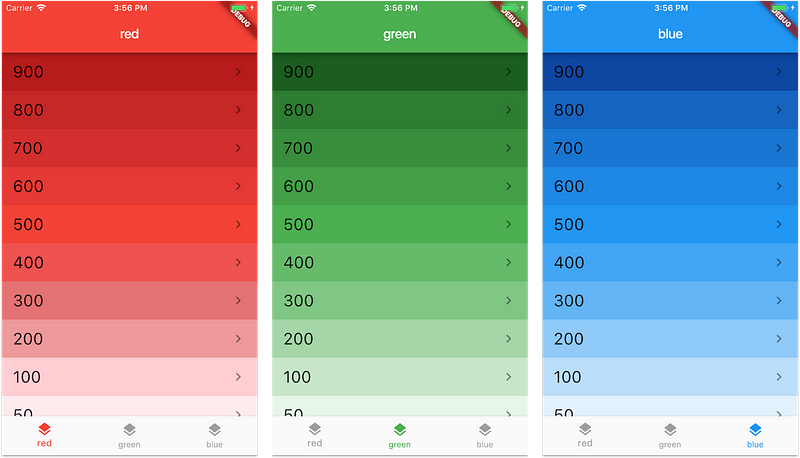
What we want is for each tab to have its own navigation stack. This is so that we don’t lose the navigation history when switching tabs. Example:
How to build this? Short version:
- Create an app with a
Scaffoldand aBottomNavigationBar. - In the
Scaffoldbody, create aStackwith one child for each tab. - Each child is an
Offstagewidget with a childNavigator. - Don’t forget to handle Android back navigation with
WillPopScope.
Want the longer and more interesting explanation? First, a couple of disclaimers:
- This article assumes you are familiar with navigation in Flutter. See the Navigation basics tutorial, as well as the Navigator, MaterialPageRoute, and MaterialApp classes for more context.
- Some of this code is experimental. If you know of a better way, please let me know.
Ok, let’s get started.
It’s all about the navigators
All Flutter apps always define a MaterialApp. Normally this sits at the root of the widget tree:
Then, we can define our App class like so:
Here, BottomNavigation is a custom widget that draws the three tabs with the correct colors, using BottomNavigationBar. It takes the currentTab as an input and calls the _selectTab method to update the state as needed.
The interesting part is the _buildBody() method. For simplicity, we can start by adding a FlatButton with a callback to push a new page:
How does the _push() method work?
MaterialPageRoutetakes care of creating a new route to be pushedNavigator.of(context)finds aNavigatorup the widget tree, and uses it to push the new route.
You may wonder, where does the Navigator come from?
We haven’t created one ourselves and the parent of our App class is the MaterialApp at the root of the widget tree.
As it turns out, MaterialApp creates its own Navigator internally.
However, if we just use Navigator.of(context) to push the new route, something unexpected happens.
The whole BottomNavigationBar and its contents slide away as the new page is presented. Not cool. ?
What we actually want is for the detail page to be pushed over the main page, but to keep the BottomNavigationBar at the bottom.
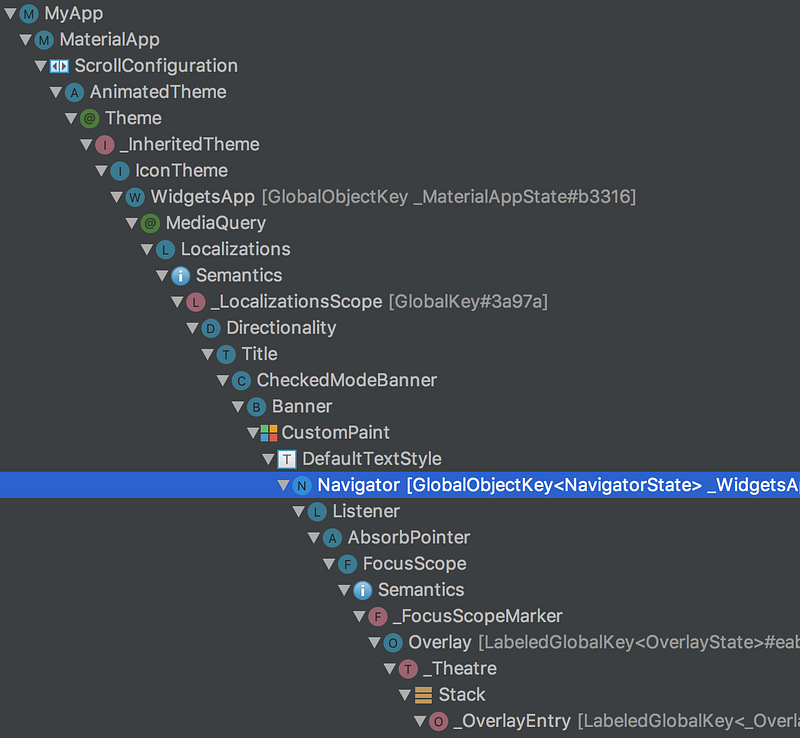
This does not work because Navigator.of(context) finds an ancestor of the BottomNavigatorBar itself. In fact, the widget tree looks something like this:
▼ MyApp
 ▼ MaterialApp
  ▼ <some other widgets>
   ▼ Navigator
    ▼ <some other widgets>
     ▼ App
      ▼ Scaffold
       ▼ body: <some other widgets>
       ▼ BottomNavigationBar
And if we open up the Flutter inspector, here it is:
If we could use a Navigator that is not an ancestor of our BottomNavigationBar, then things would work as intended.
Ok Navigator, show me what you can do
The solution is to wrap the body of our Scaffold object with a new Navigator.
But before we do that, let’s introduce thee new classes that we’ll be using to show our final UI.
The first class is called TabNavigator:
class TabNavigatorRoutes {
  static const String root = '/';
  static const String detail = '/detail';
}

class TabNavigator extends StatelessWidget {
  TabNavigator({this.navigatorKey, this.tabItem});
  final GlobalKey<NavigatorState> navigatorKey;
  final TabItem tabItem;

  void _push(BuildContext context, {int materialIndex: 500}) {
    var routeBuilders = _routeBuilders(context, materialIndex: materialIndex);

    Navigator.push(
        context,
        MaterialPageRoute(
            builder: (context) =>
                routeBuilders[TabNavigatorRoutes.detail](context)));
  }

  Map<String, WidgetBuilder> _routeBuilders(BuildContext context,
      {int materialIndex: 500}) {
    return {
      TabNavigatorRoutes.root: (context) => ColorsListPage(
            color: TabHelper.color(tabItem),
            title: TabHelper.description(tabItem),
            onPush: (materialIndex) =>
                _push(context, materialIndex: materialIndex),
          ),
      TabNavigatorRoutes.detail: (context) => ColorDetailPage(
            color: TabHelper.color(tabItem),
            title: TabHelper.description(tabItem),
            materialIndex: materialIndex,
          ),
    };
  }

  @override
  Widget build(BuildContext context) {
    var routeBuilders = _routeBuilders(context);

    return Navigator(
        key: navigatorKey,
        initialRoute: TabNavigatorRoutes.root,
        onGenerateRoute: (routeSettings) {
          return MaterialPageRoute(
              builder: (context) => routeBuilders[routeSettings.name](context));
        });
  }
}
How does this work?
- On lines 1–4, we define two route names:
/and/detail - On line 7, we define the constructor for
TabNavigator. This takes anavigatorKeyand atabItem. - Note that
navigatorKeyhas typeGlobalKey<NavigatorState>. We need this to uniquely identify the navigator across the entire app (read more aboutGlobalKeyhere). - On line 22, we define a
_routeBuildersmethod, which associates aWidgetBuilderto each of the two routes we have defined. We’ll look at theColorsListPageandColorDetailPagein a second. - On line 38, we implement the
build()method, which returns a newNavigatorobject. - This takes a
keyand aninitialRouteparameter. - It also has an
onGenerateRoutemethod, which is called every time a route needs to be generated. This makes use of the_routeBuilders()method we have defined above. - On lines 11–19 we define a
_push()method which is used to push a detail route with aColorDetailPage.
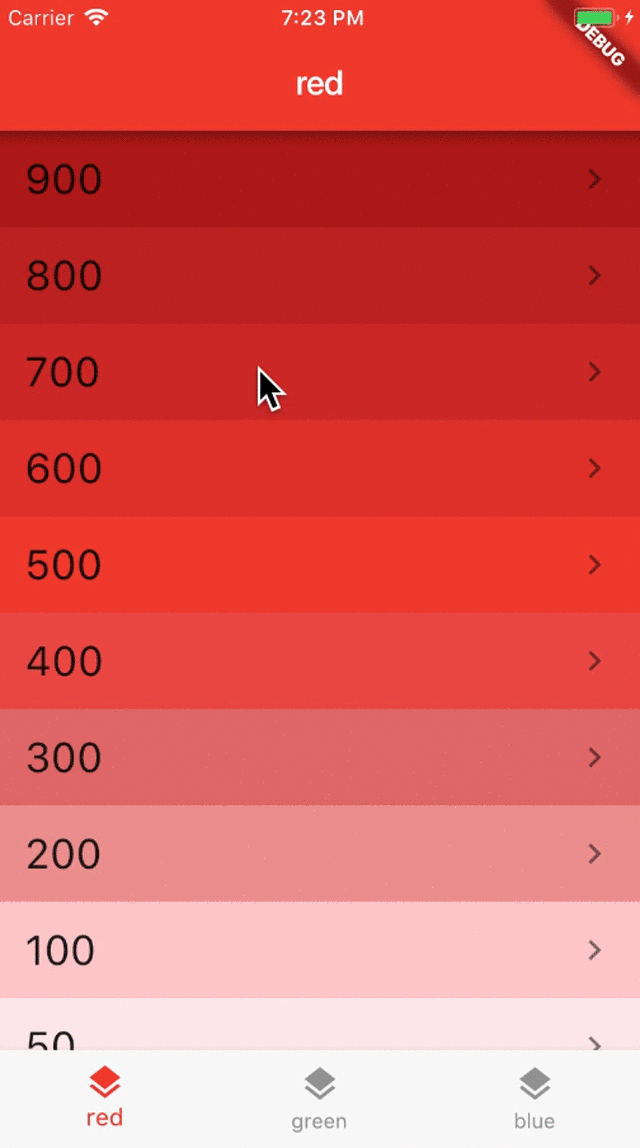
Here is the ColorsListPage class:
class ColorsListPage extends StatelessWidget {
ColorsListPage({this.color, this.title, this.onPush});
final MaterialColor color;
final String title;
final ValueChanged<int> onPush;
@override
Widget build(BuildContext context) {
return Scaffold(
appBar: AppBar(
title: Text(
title,
),
backgroundColor: color,
),
body: Container(
color: Colors.white,
child: _buildList(),
));
}
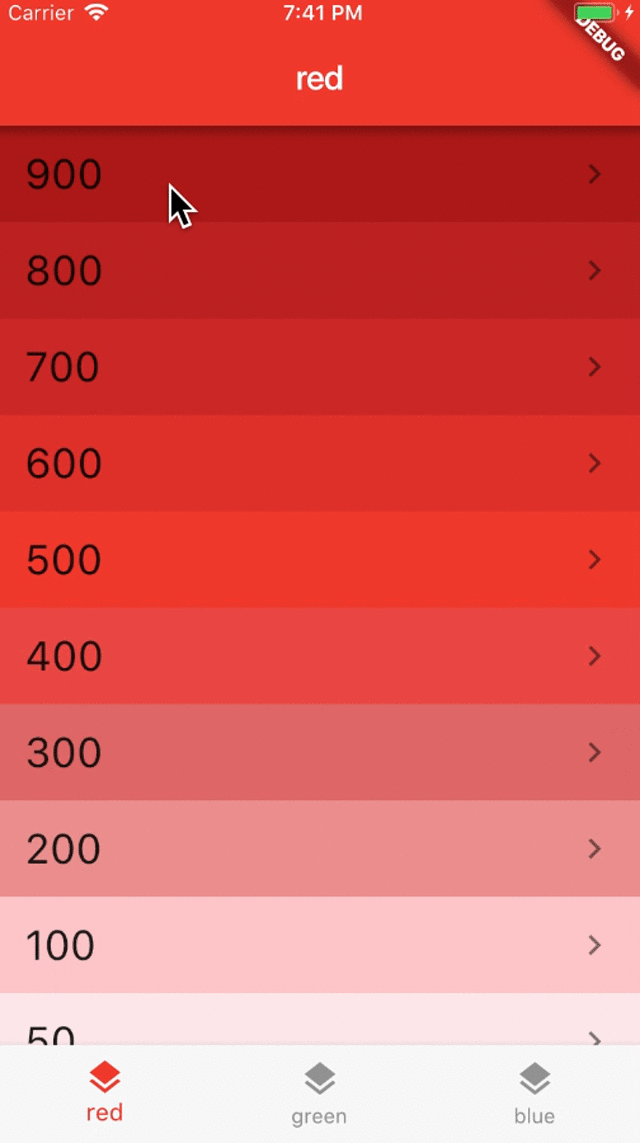
final List<int> materialIndices = [900, 800, 700, 600, 500, 400, 300, 200, 100, 50];
Widget _buildList() {
return ListView.builder(
itemCount: materialIndices.length,
itemBuilder: (BuildContext content, int index) {
int materialIndex = materialIndices[index];
return Container(
color: color[materialIndex],
child: ListTile(
title: Text('$materialIndex', style: TextStyle(fontSize: 24.0)),
trailing: Icon(Icons.chevron_right),
onTap: () => onPush(materialIndex),
),
);
});
}
}
The purpose of this class is to show a ListView with all the color shades of the input MaterialColor. MaterialColor is nothing more than a ColorSwatchwith ten different shades.
For completeness, here is the ColorDetailPage:
class ColorDetailPage extends StatelessWidget {
  ColorDetailPage({this.color, this.title, this.materialIndex: 500});
  final MaterialColor color;
  final String title;
  final int materialIndex;

  @override
  Widget build(BuildContext context) {

    return Scaffold(
      appBar: AppBar(
        backgroundColor: color,
        title: Text(
          '$title[$materialIndex]',
        ),
      ),
      body: Container(
        color: color[materialIndex],
      ),
    );
  }
}
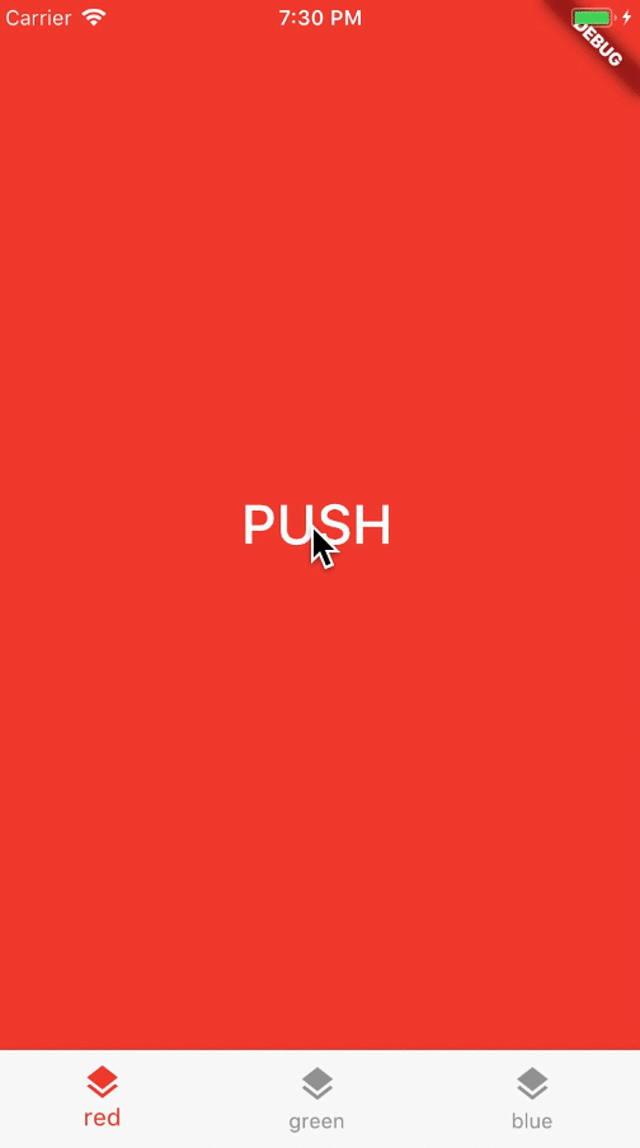
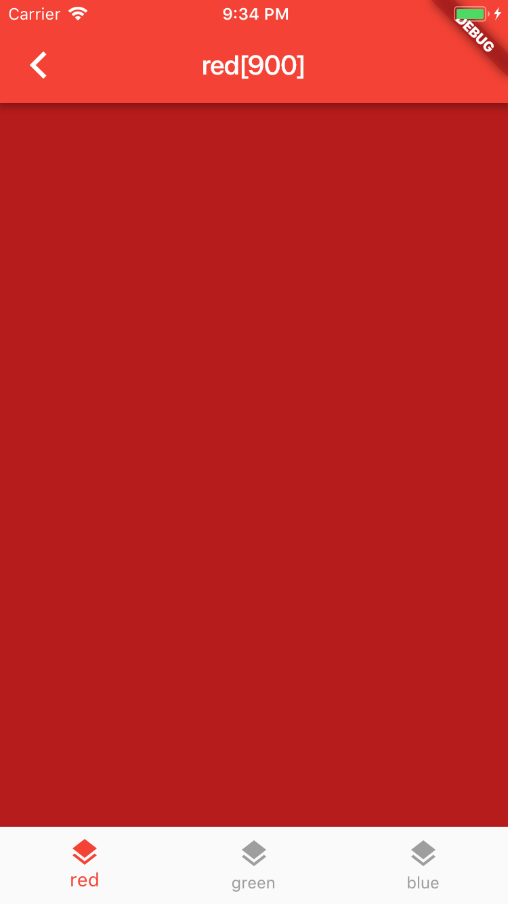
This one is simple: it just shows a page with an AppBar and the color shade that is selected from the input MaterialColor. It looks like this:
Putting things together
Now that we have our TabNavigator, let’s go back to our App and make use of it:
  final navigatorKey = GlobalKey<NavigatorState>();

  @override
  Widget build(BuildContext context) {
    return Scaffold(
      body: TabNavigator(
        navigatorKey: navigatorKey,
        tabItem: currentTab,
      ),
      bottomNavigationBar: BottomNavigation(
        currentTab: currentTab,
        onSelectTab: _selectTab,
      ),
    );
  }
- First, we define a
navigatorKey. - Then in our
build()method we create aTabNavigatorwith it and also pass in thecurrentTab.
If we run the app now, we can see that push works correctly when selecting a list item, and the BottomNavigationBar stays in place. Yay! ?
There is one problem though. Switching between tabs doesn’t seem to work, as we always show the red pages inside the Scaffold body.
Multiple Navigators
This is because we have defined a new navigator, but this is shared across all three tabs.
Remember: what we want is independent navigation stacks for each tab!
Let’s fix this:
class App extends StatefulWidget {
  @override
  State<StatefulWidget> createState() => AppState();
}

class AppState extends State<App> {

  TabItem currentTab = TabItem.red;
  Map<TabItem, GlobalKey<NavigatorState>> navigatorKeys = {
    TabItem.red: GlobalKey<NavigatorState>(),
    TabItem.green: GlobalKey<NavigatorState>(),
    TabItem.blue: GlobalKey<NavigatorState>(),
  };

  void _selectTab(TabItem tabItem) {
    setState(() {
      currentTab = tabItem;
    });
  }

  @override
  Widget build(BuildContext context) {
    return Scaffold(
      body: Stack(children: <Widget>[
        _buildOffstageNavigator(TabItem.red),
        _buildOffstageNavigator(TabItem.green),
        _buildOffstageNavigator(TabItem.blue),
      ]),
      bottomNavigationBar: BottomNavigation(
        currentTab: currentTab,
        onSelectTab: _selectTab,
      ),
    );
  }

  Widget _buildOffstageNavigator(TabItem tabItem) {
    return Offstage(
      offstage: currentTab != tabItem,
      child: TabNavigator(
        navigatorKey: navigatorKeys[tabItem],
        tabItem: tabItem,
      ),
    );
  }
}
A few notes:
- On lines 9–13 we define a map of global navigator keys. This is what we need to ensure we use multiple navigators.
- The body of our
Scaffoldis now aStackwith three children. - Each child is built in the
_buildOffstageNavigator()method. - This uses the
Offstagewidget with a childTabNavigator. Theoffstageproperty is true if the tab being rendered doesn’t match the current tab. - We pass
navigatorKey[tabItem]to ourTabNavigatorto ensure that we have one separate navigator key for each tab.
If we compile and run the app, everything now works as intented. We can push/ pop each navigator independently, and the offstage navigators keep their state. ?
One more thing
If we run the app on Android, we observe an interesting behaviour when we press the back button:
The app is dismissed and we are back to the home screen!
This is because we haven’t specified how the back button should be handled.
Let’s fix that:
  @override
  Widget build(BuildContext context) {
    return WillPopScope(
      onWillPop: () async =>
          !await navigatorKeys[currentTab].currentState.maybePop(),
      child: Scaffold(
        body: Stack(children: <Widget>[
          _buildOffstageNavigator(TabItem.red),
          _buildOffstageNavigator(TabItem.green),
          _buildOffstageNavigator(TabItem.blue),
        ]),
        bottomNavigationBar: BottomNavigation(
          currentTab: currentTab,
          onSelectTab: _selectTab,
        ),
      ),
    );
  }
This is done with the WillPopScope widget, which controls how routes are dismissed. From the documentation of WillPopScope:
Registers a callback to veto attempts by the user to dismiss the enclosing /// [ModalRoute]
On line 4 we define a onWillPop() callback to return false if the current navigator can pop, or true otherwise.
If we run the app again, we can see that pressing the back button dismisses any pushed routes, and only if we press it again we leave the app.

One thing to note is that when we push a new route on Android, this slides in from the bottom. Instead the convention is to slide in from the right on iOS.
Also, the transition on Android is a bit jittery for some reason. I’m not sure if this is an emulator issue and it looks ok on a real device.
Credits
Credits go to Brian Egan for finding a way to make the navigators work. It was his idea to use a Stack with Offstage widgets to preserve the state of the navigators.
Wrap up
Today we have learned a good deal about Flutter navigation, and how to combine BottomNavigationBar, Stack, Offstage and Navigator widgets to enable multiple navigation stacks.
Using Offstage widgets ensures that all our navigators preserve their state as they remain inside the widget tree. This likely comes with some performance penalty, so I recommend to profile your app if you choose to use them.
The entire source code for this article can be found here:
Please let me know in the comments if I have done something silly, or you know a better way of doing this. ?
Happy coding!
For more articles and video tutorials, check out Coding With Flutter.
I’m @biz84 on Twitter. You can also see my GitHub page. Did you like this article? Then smash that clap ? button! It makes me feel awesome so I can write more about Flutter. ?
Written by
iOS, Flutter Developer & Blogger ❖ https://codingwithflutter.com ❖ http://bizz84.github.io ❖ Open Source https://github.com/bizz84❖ Watching #ClimateChange