JavaScript, Python, Ruby — you name it — you can create a prompt to display any programming language using Powerlevel9k, a highly customisable terminal framework for the Zsh shell.
This tutorial will provide examples and a step-by-step guide to configure custom prompt sections for Powerlevel9k with programming language icons and your choice of text and colors.
- Screenshots
- Powerlevel9k setup
- Configure a prompt section
- Example .zshrc
- JavaScript prompt
- Python prompt
- Ruby prompt
- Find out more
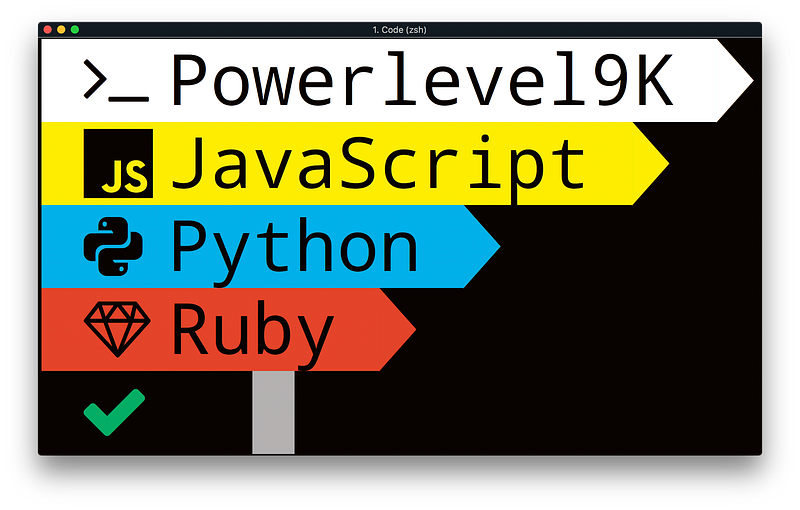
Screenshots
These screenshots give you an idea of what programming prompt sections could look like once you have set this up. The first image below shows examples of JavaScript, Python and Ruby prompt segments.
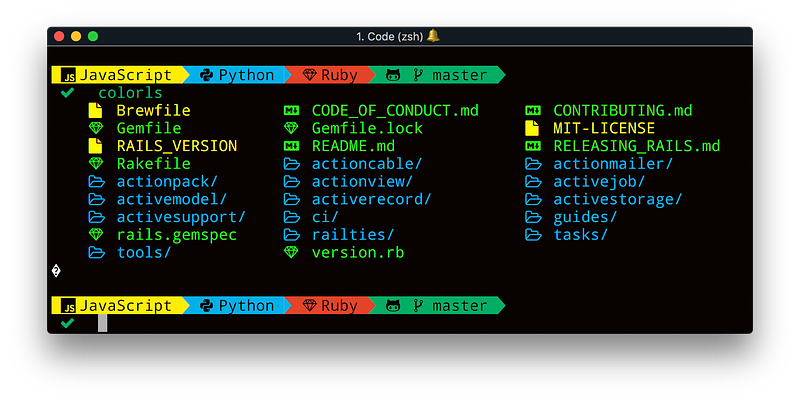
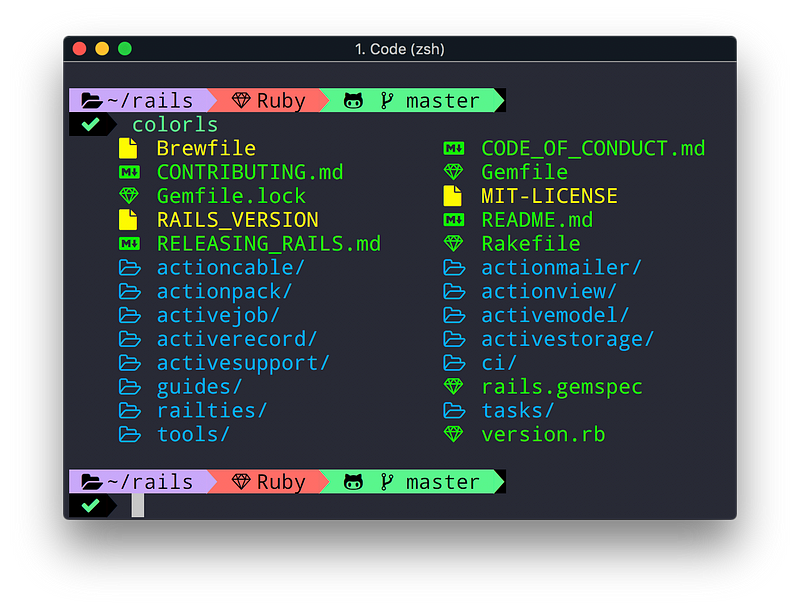
Below is the Ruby prompt displayed along with the directory, in this case the Ruby on Rails repository, along with the git branch and status . This is how you might apply a programming language prompt for a specific project you are working on.
Powerlevel9k setup
This tutorial extends from the setup of Powerlevel9k with Nerd Fonts, Zsh and iTerm2 that I covered in: How you can style your terminal like Medium, freeCodeCamp, or any way you want.

In that article I also explained how to choose a color scheme — so check it out if you are looking for more guidance on setting your own colors for your terminal prompt.
Assuming that you have now set up your terminal with Powerlevel9k, here is a guide to show you how to configure prompt sections that you can use for your favourite programming language.
Configure a prompt section
I will show you step-by-step how to set up a custom prompt section, that you can use to create your own custom prompt for the programming language of your choice.
This will use an example of how to create a custom JavaScript prompt section. Here is a screenshot of the prompt that you will learn to make.

Add your custom section to your setup
Powerlevel9k has some default settings for the prompt configuration. In this part of the tutorial, I will show you how to override them with your own choice of prompt sections and layout.
You need to add this configuration to your .zshrc file, which is normally located in your home directory after you install Zsh.
Powerlevel9k uses environment variables to determine what to display in your prompt. The first one, POWERLEVEL9K_LEFT_PROMPT_ELEMENTS, contains a list of the sections you want on the left hand side of your prompt. You can add/remove sections or change them here.
# Customise the Powerlevel9k prompts
POWERLEVEL9K_LEFT_PROMPT_ELEMENTS=(
  dir
  custom_javascript
  vcs
  newline
  status
)
POWERLEVEL9K_RIGHT_PROMPT_ELEMENTS=()
POWERLEVEL9K_PROMPT_ADD_NEWLINE=true
Here is a quick explanation of the sections: dir is the current working directory; custom_javascript is a custom section; vsc is the version control system, such as git; newline starts a new line in your terminal; status shows a tick if the last command was successful or the return code if there was an error.
Other options for your prompt are to have sections in a right hand side prompt, set using POWERLEVEL9K_RIGHT_PROMPT_ELEMENTS, and whether you want a new line in your terminal after the results of each command, which is set by POWERLEVEL9K_PROMPT_ADD_NEWLINE.
For an extended guide to custom prompt configurations, check out Powerlevel9k’s guide to prompt customization.
Set up Nerd Fonts on your computer
To use programming icons in your prompt you need to first install Nerd Fonts — a special font set that includes lots of extra icons. If you haven’t installed it already, check out my guide on how to do this by clicking the link below.
Nerd Fonts: How to install, configure, and remove programming fonts on a mac

Pick an icon from Nerd Fonts
Once Nerd Fonts is installed, you can pick some programming icons for your prompt. You can search for them on the Nerd Fonts website. For example, a search for JavaScript displays a range of related icons.
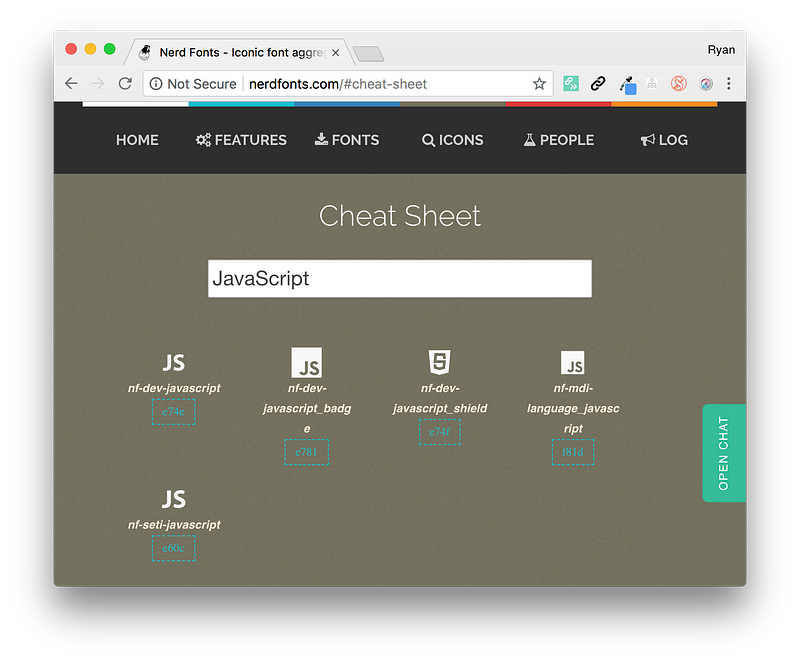
Once you find an icon you like, copy the four character code for that icon that is displayed under its name. For example, if you like the icon nf-dev-javascript_badge then copy the code e781.
You then can use this four digit code to display the icon in your prompt by including it in a custom command.
Create your custom command
To configure a custom section you need to define three environment variables. They all need to start with POWERLEVEL9K_CUSTOM_. The first one is the command that will be called to display content in your prompt section.
POWERLEVEL9K_CUSTOM_JAVASCRIPT="echo -n '\ue781' JavaScript"
echo -nprints the line without starting a newline at the end of it‘\ue781’is the icon you want to display — it needs to be in quotes and start with\uto tell the shell to interpret it as a unicode escape sequence to print the icon rather than the four character codeJavaScriptis the text you want to be shown following the icon
Choose the background and foreground colors
The other two necessary environment variables set your chosen background and foreground colors for your custom prompt section.
POWERLEVEL9K_CUSTOM_JAVASCRIPT_FOREGROUND="black"
POWERLEVEL9K_CUSTOM_JAVASCRIPT_BACKGROUND="yellow"
The values of the color names can be changed in iTerm2’s Preferences.
iTerm -> Preferences -> Profiles -> Colors
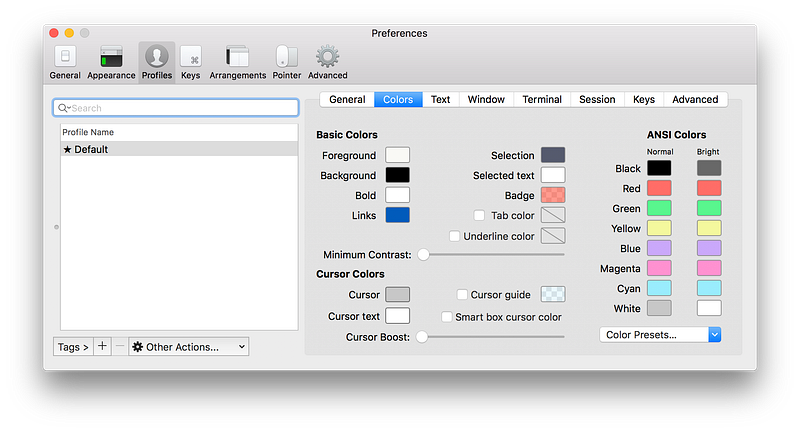
There is also an option to load in a color scheme here. One source is iterm2colorschemes, which gives you about 175 choices. Once you have downloaded them, select iTerm -> Preferences -> Profiles -> Colors -> Color Presets -> Import then select the colour scheme you like, such as the Dracula and Solarised Dark themes.
Load Nerd Fonts and Powerlevel9k script
Once you have set up your prompt sections and custom segment in your zshrc, you then need to set Powerlevel9k to use Nerd Fonts and load the theme’s script.
# Load Nerd Fonts with Powerlevel9k theme for Zsh
POWERLEVEL9K_MODE='nerdfont-complete'
source ~/powerlevel9k/powerlevel9k.zsh-theme
Below I have included an example of what it could look like when you add the whole setup together in your .zshrc.
Example .zshrc
Here is an example .zshrc setup that you can use as a guide for your own configuration.
# Customise the Powerlevel9k prompts
POWERLEVEL9K_LEFT_PROMPT_ELEMENTS=(
  dir
  custom_javascript
  vcs
  newline
  status
)
POWERLEVEL9K_RIGHT_PROMPT_ELEMENTS=()
POWERLEVEL9K_PROMPT_ADD_NEWLINE=true
# Create a custom JavaScript prompt section
POWERLEVEL9K_CUSTOM_JAVASCRIPT="echo -n '\ue781' JavaScript"
POWERLEVEL9K_CUSTOM_JAVASCRIPT_FOREGROUND="black"
POWERLEVEL9K_CUSTOM_JAVASCRIPT_BACKGROUND="yellow"
# Load Nerd Fonts with Powerlevel9k theme for Zsh
POWERLEVEL9K_MODE='nerdfont-complete'
source ~/powerlevel9k/powerlevel9k.zsh-theme
Javascript prompt
POWERLEVEL9K_CUSTOM_JAVASCRIPT="echo -n '\ue781' JavaScript"
POWERLEVEL9K_CUSTOM_JAVASCRIPT_FOREGROUND="black"
POWERLEVEL9K_CUSTOM_JAVASCRIPT_BACKGROUND="yellow"
Python prompt
POWERLEVEL9K_CUSTOM_PYTHON="echo -n '\uf81f' Python"
POWERLEVEL9K_CUSTOM_PYTHON_FOREGROUND="black"
POWERLEVEL9K_CUSTOM_PYTHON_BACKGROUND="blue"
Ruby prompt
POWERLEVEL9K_CUSTOM_RUBY="echo -n '\ue21e' Ruby"
POWERLEVEL9K_CUSTOM_RUBY_FOREGROUND="black"
POWERLEVEL9K_CUSTOM_RUBY_BACKGROUND="red"
Find out more
There are loads of additional things you can add to your terminal to make it a creative, enjoyable and productive experience. For example, you could add Lolcat, Colorls, Catpix, and other Ruby Gems to add color to your terminal.
Changed your mind? You can always remove this theme and go back to the default settings. Check out this guide that explains how you can do this step-by-step.
SOURCE:
Written by
Software Developer & Technology Writer. I write tutorials about Ruby, JavaScript, Docker, Git, Bash & Zsh, that are published in freeCodeCamp & The Code Review
The Code Review
Programming tutorials for web and software developers