A tutorial to the power of Hero widgets in Flutter
This article is the fourth article in a series of articles meant for an in-detail study of Flutter widgets. After covering ListViews, TextFields and FloatingActionButtons in depth, we will now go into the Hero widget in Flutter.
Introduction to Hero Animations
A Hero Animation in one sentence is simply an element of one screen “flying” to the next when the app goes to the next page.

Hero Animations take an element like an icon which is now called a “Hero”and once the page transition is triggered, usually by clicking on the icon, the hero “flies” to the next page. When the user navigates back to the earlier page, the animation goes in the other direction and the icon goes back to its place.
We’ll discuss not only basic hero animations but things we can customize about it. Let’s see the basics first.
Creating a Basic Hero Animation
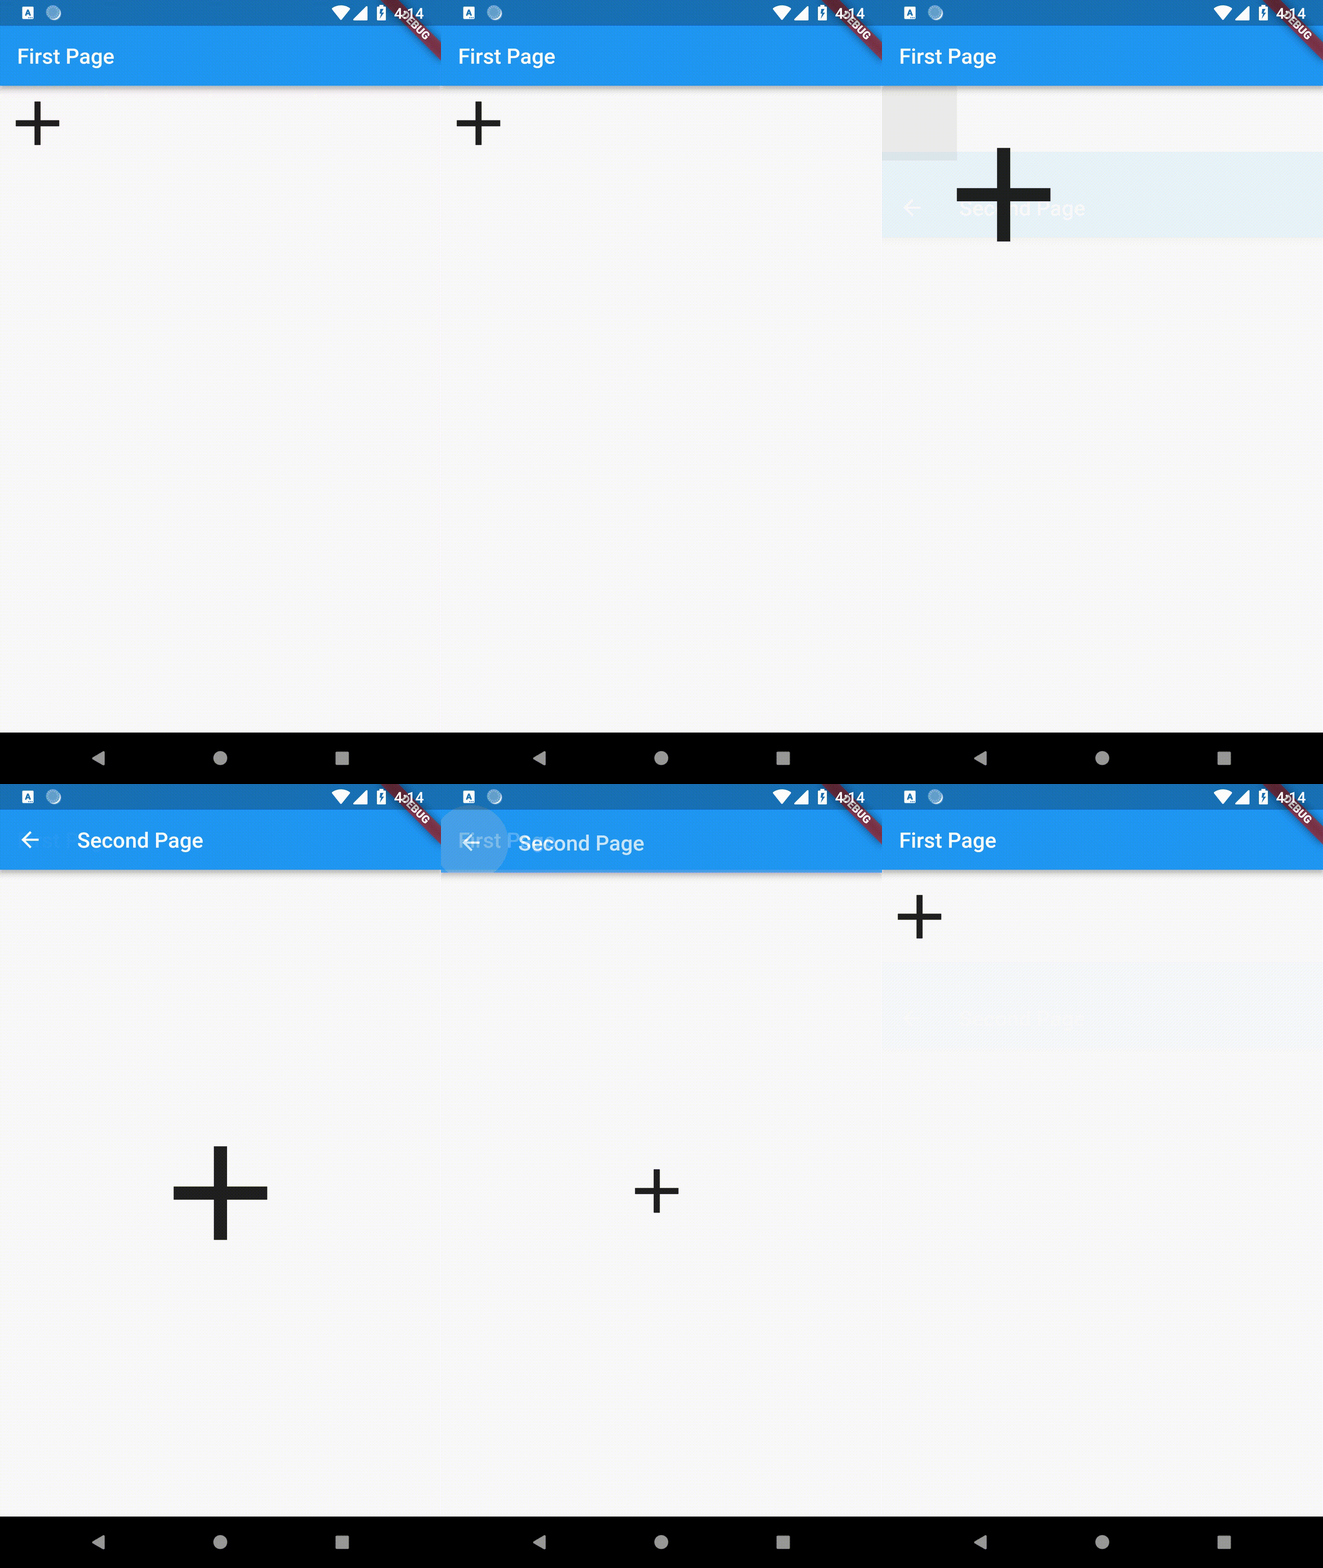
Hero animations are probably one of the easiest animations to do in Flutter and don’t require much setup. Taking a look at the example above, we can see that the same app icon widget exists on both pages. All we need is a way to tell Flutter that both of them are linked.
We do this by wrapping an element like an icon in a Hero widget.
Hero(
  tag: "DemoTag",
  child: Icon(
    Icons.add,
    size: 70.0,
  ),
),
We supply it a tag to give this specific hero a name. This is necessary because if we have multiple heroes on the same page, each hero knows where to fly to.
Now the app knows that there is a hero widget that wants to fly to the next page. Now all we need is a place to fly to.
All we need is a Hero widget on the second page with the same tag.
Hero(
  tag: "DemoTag",
  child: Icon(
    Icons.add,
    size: 150.0,
  ),
),
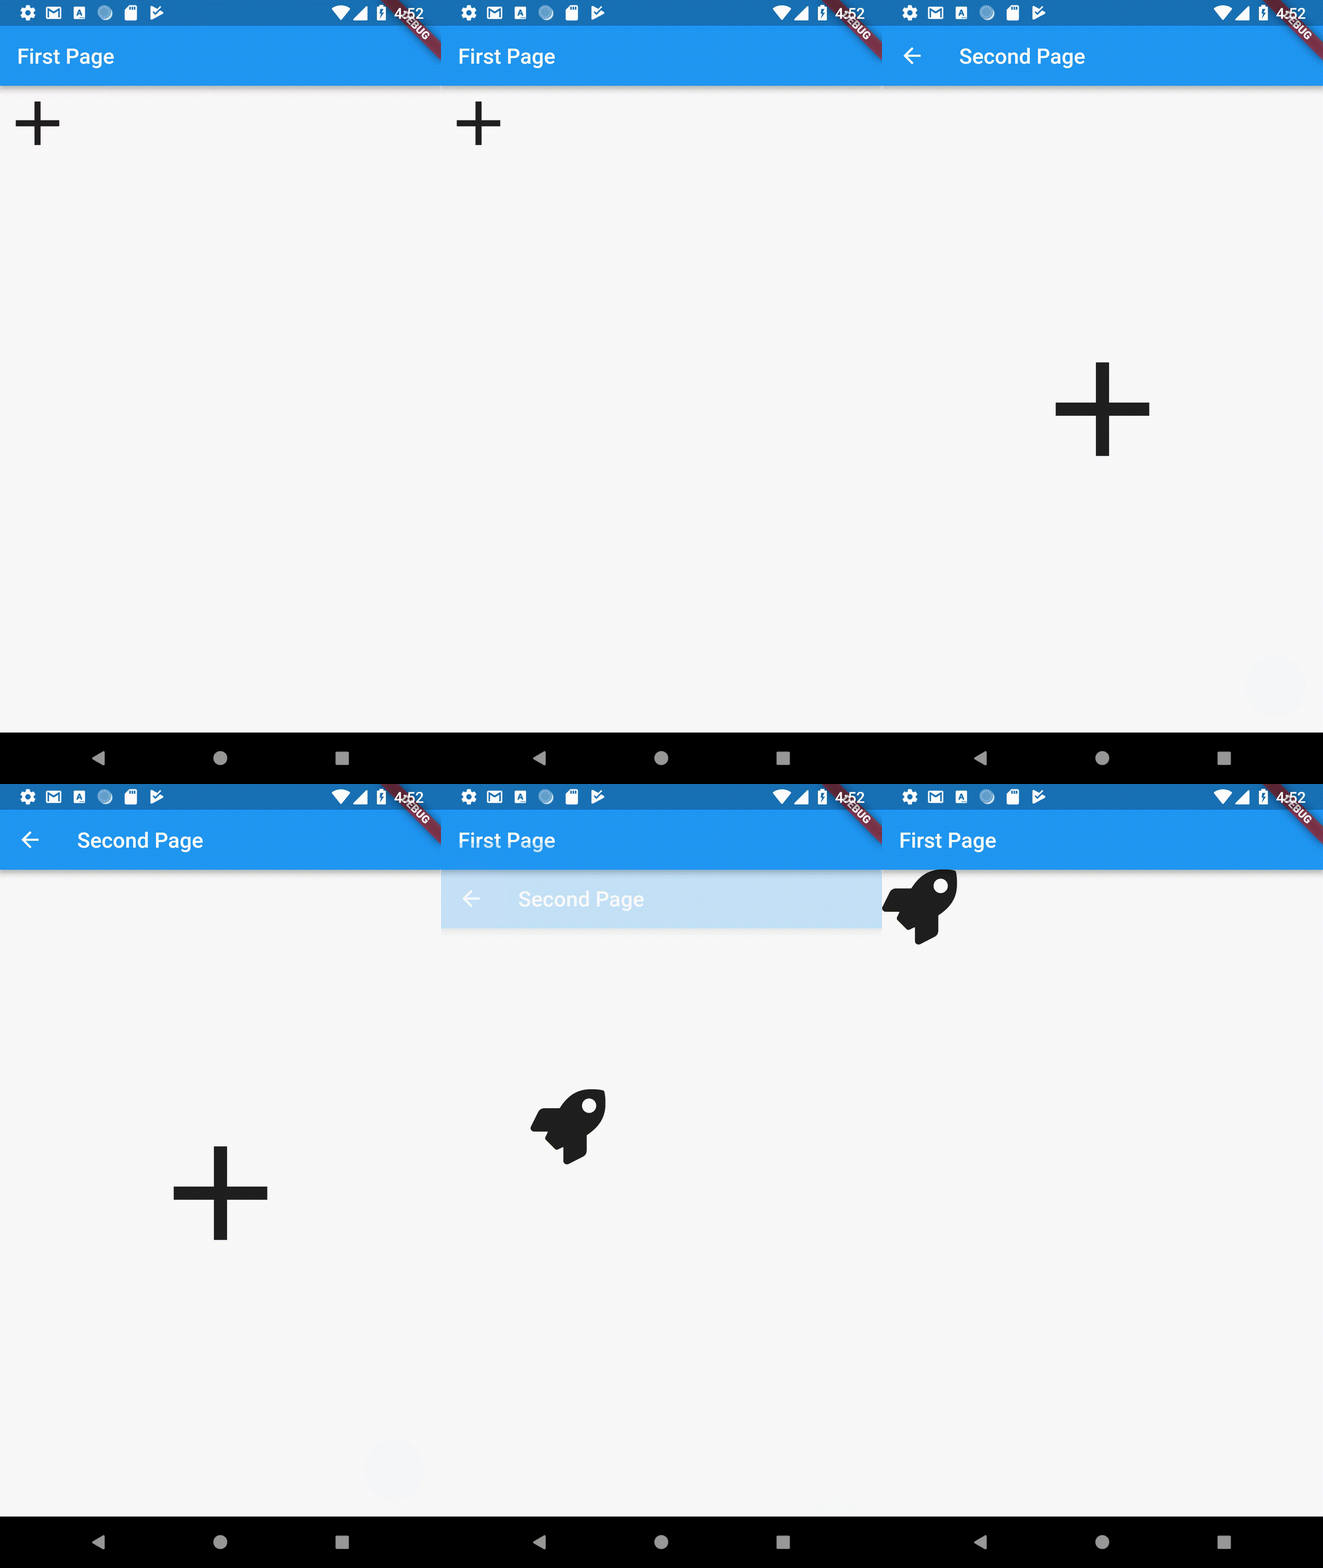
And this results in:
Customizing Hero Animations
The Hero widget allows us to customize aspects of the animation. Let’s explore a few possibilities.
Adding placeholders
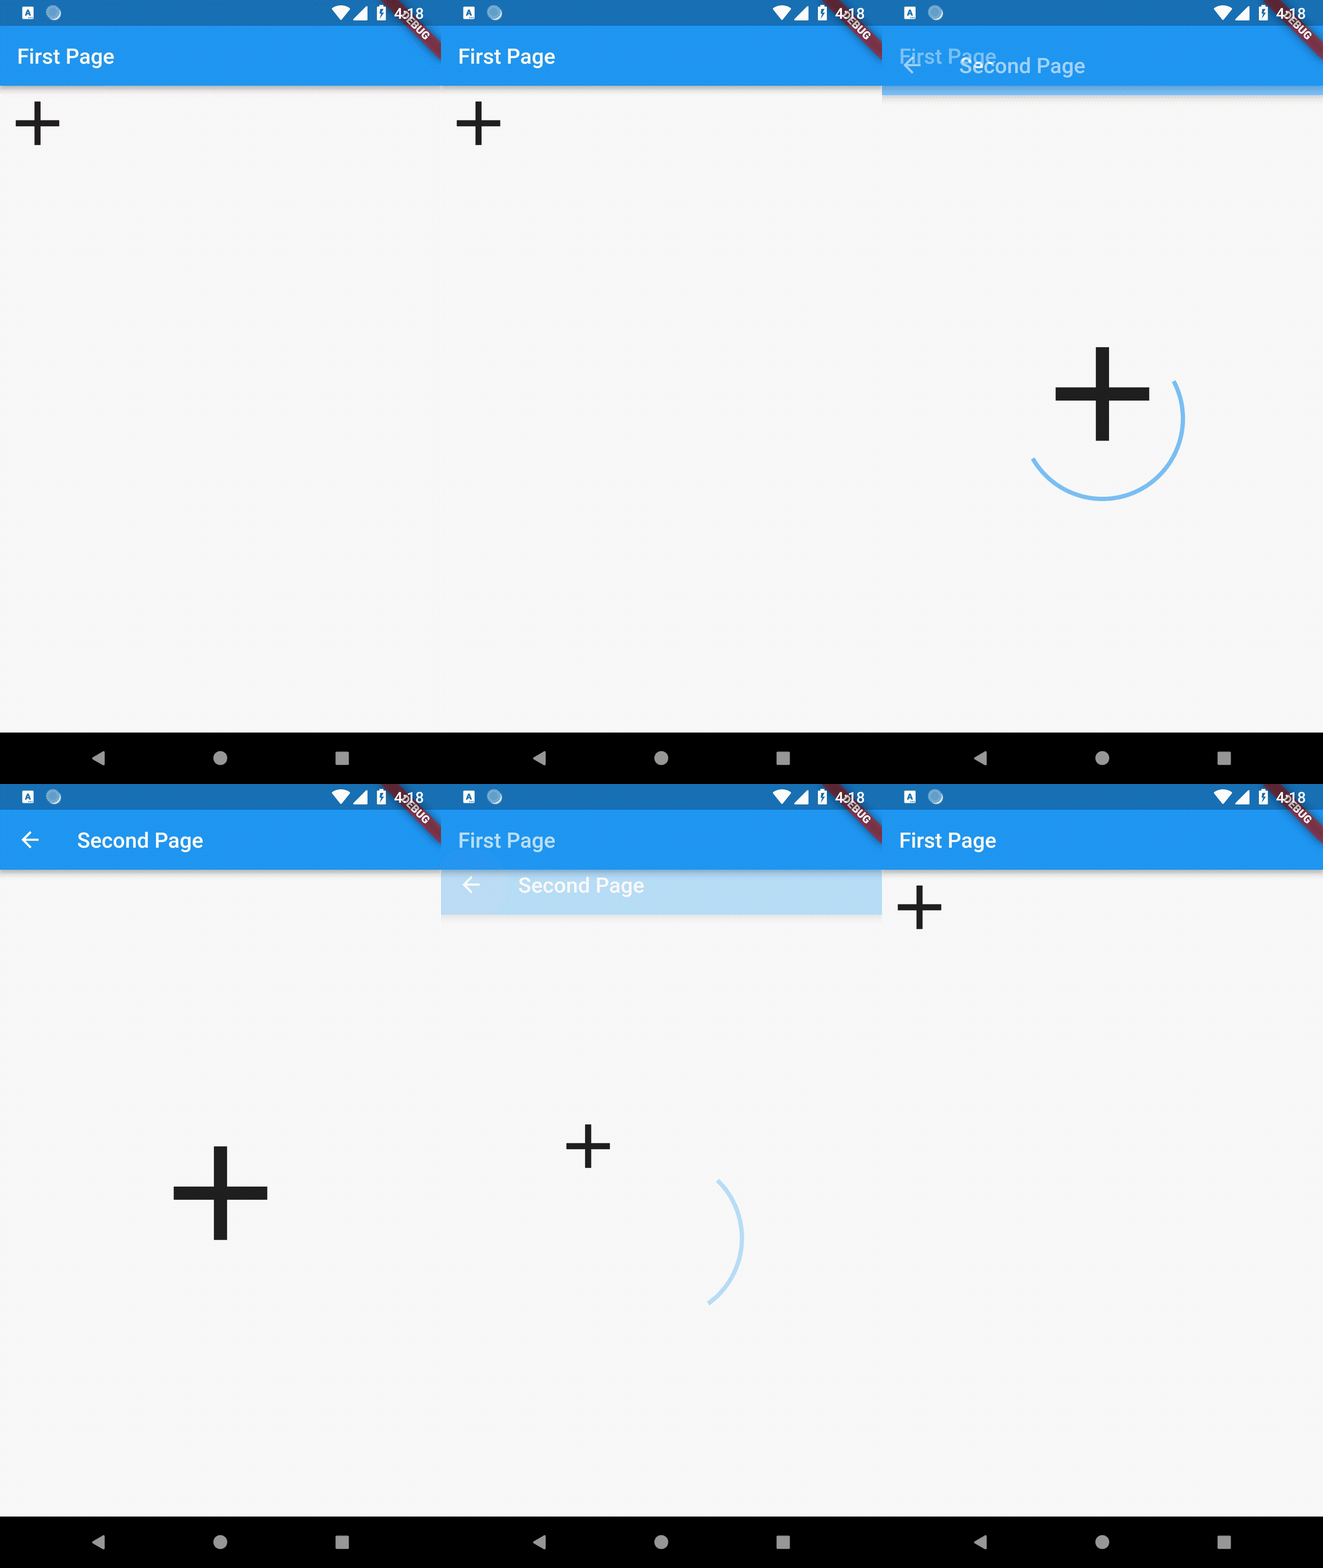
After the widget flies off the place it used to be in and before the widget arrives at the destination, there is empty space at the destination. We can add a placeholder to this location.
Let’s use a CircularProgressIndicator as a placeholder for now.
Hero(
    tag: "DemoTag",
    child: Icon(
      Icons.add,
      size: 150.0,
    ),
    placeholderBuilder: (context, widget) {
      return Container(
        height: 150.0,
        width: 150.0,
        child: CircularProgressIndicator(),
      );
    },
  ),
We use the placeholderBuilder to construct the placeholder and return the widget we would like to have as the placeholder.
Using a placeholder:
Changing the Hero widget
Flutter allows us to change the widget which actually flies from one page to the other without changing the widgets on the two pages.
Let’s use a rocket icon instead of a “+” icon as the hero without changing the children of the hero widgets.
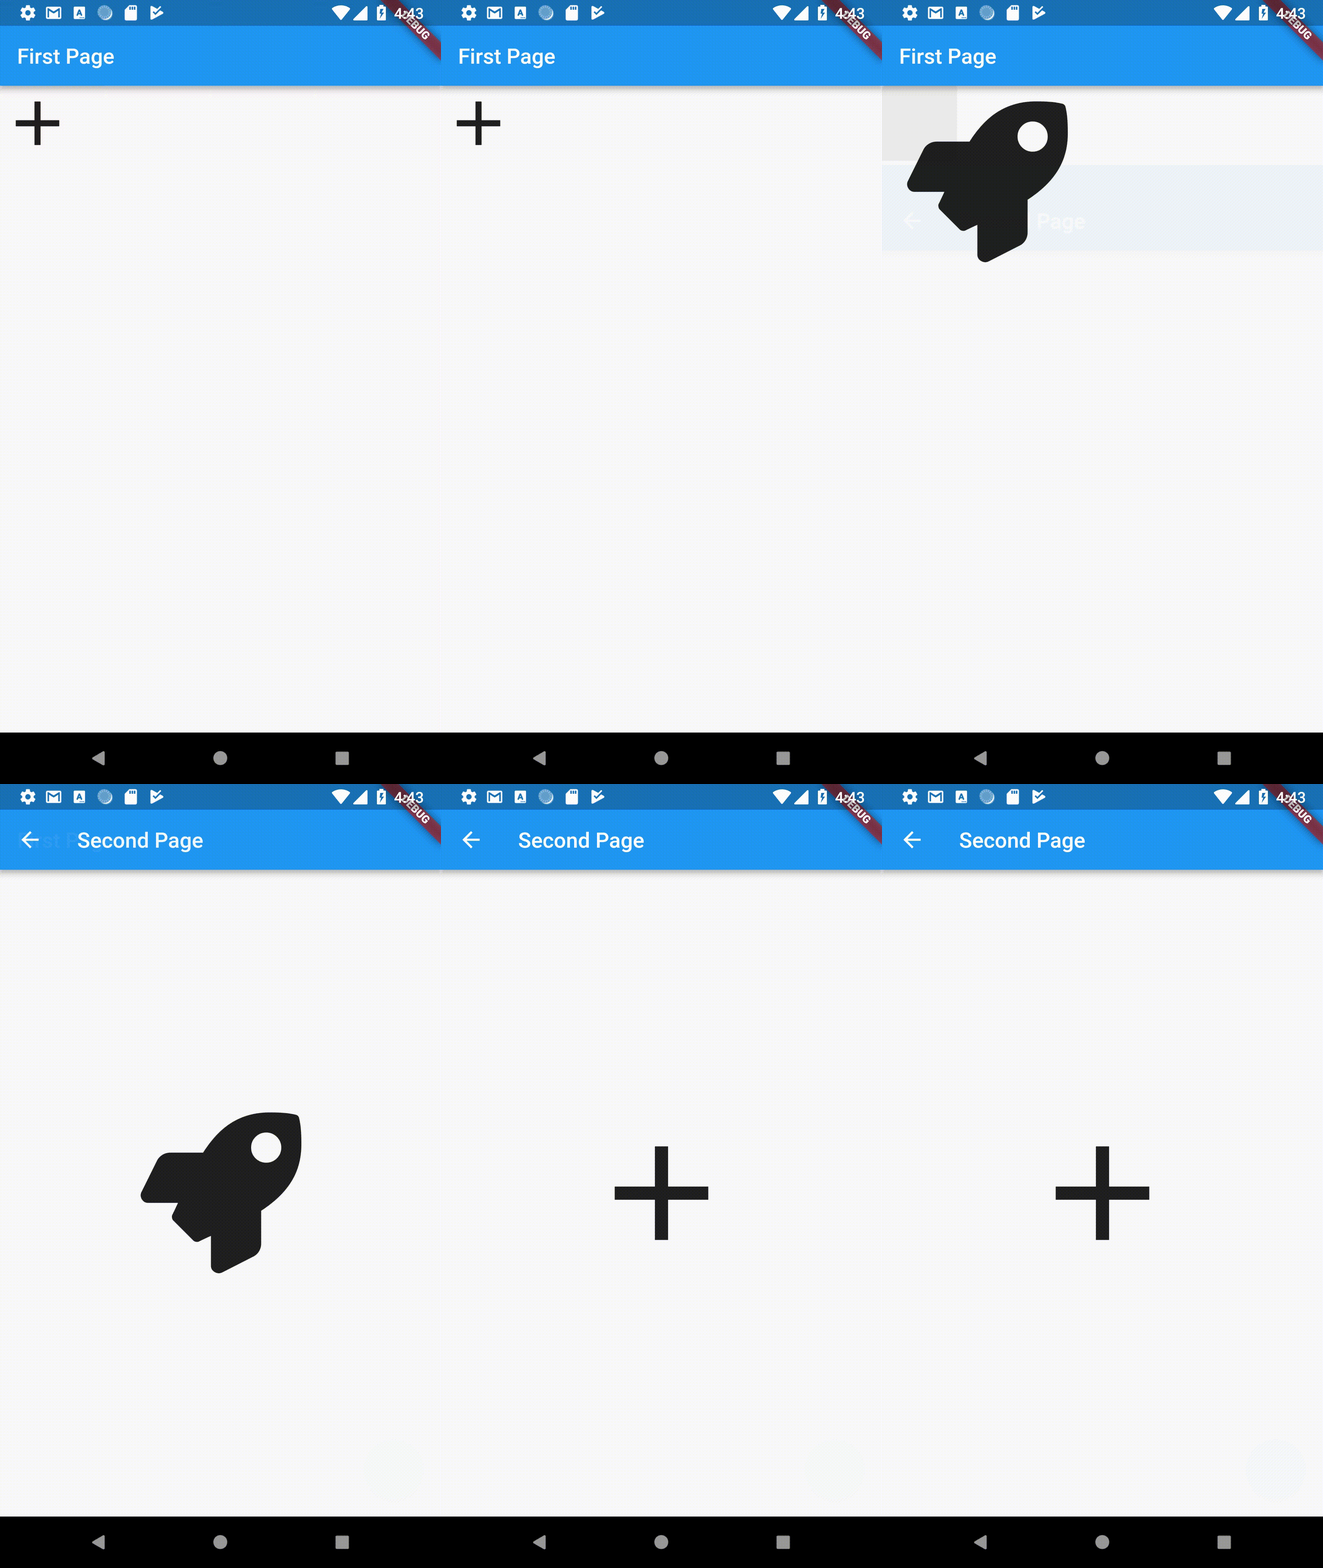
We do this using the flightShuttleBuilder parameter (Hence, the rocket example).
Hero(
  tag: "DemoTag",
  child: Icon(
    Icons.add,
    size: 150.0,
  ),
  flightShuttleBuilder: (flightContext, animation, direction,
      fromContext, toContext) {
    return Icon(FontAwesomeIcons.rocket, size: 150.0,);
  },
),
The flightShuttleBuilder method has 5 parameters and gives us the animation as well as the direction of the animation.
For now, the rocket icon size stays at 150.0 for both directions. We can have different configurations for each direction by using the direction parameter of the method.
if(direction == HeroFlightDirection.push) {
  return Icon(
    FontAwesomeIcons.rocket,
    size: 150.0,
  );
} else if (direction == HeroFlightDirection.pop){
  return Icon(
    FontAwesomeIcons.rocket,
    size: 70.0,
  );
}
Making Hero animations work with iOS back swipe gestures
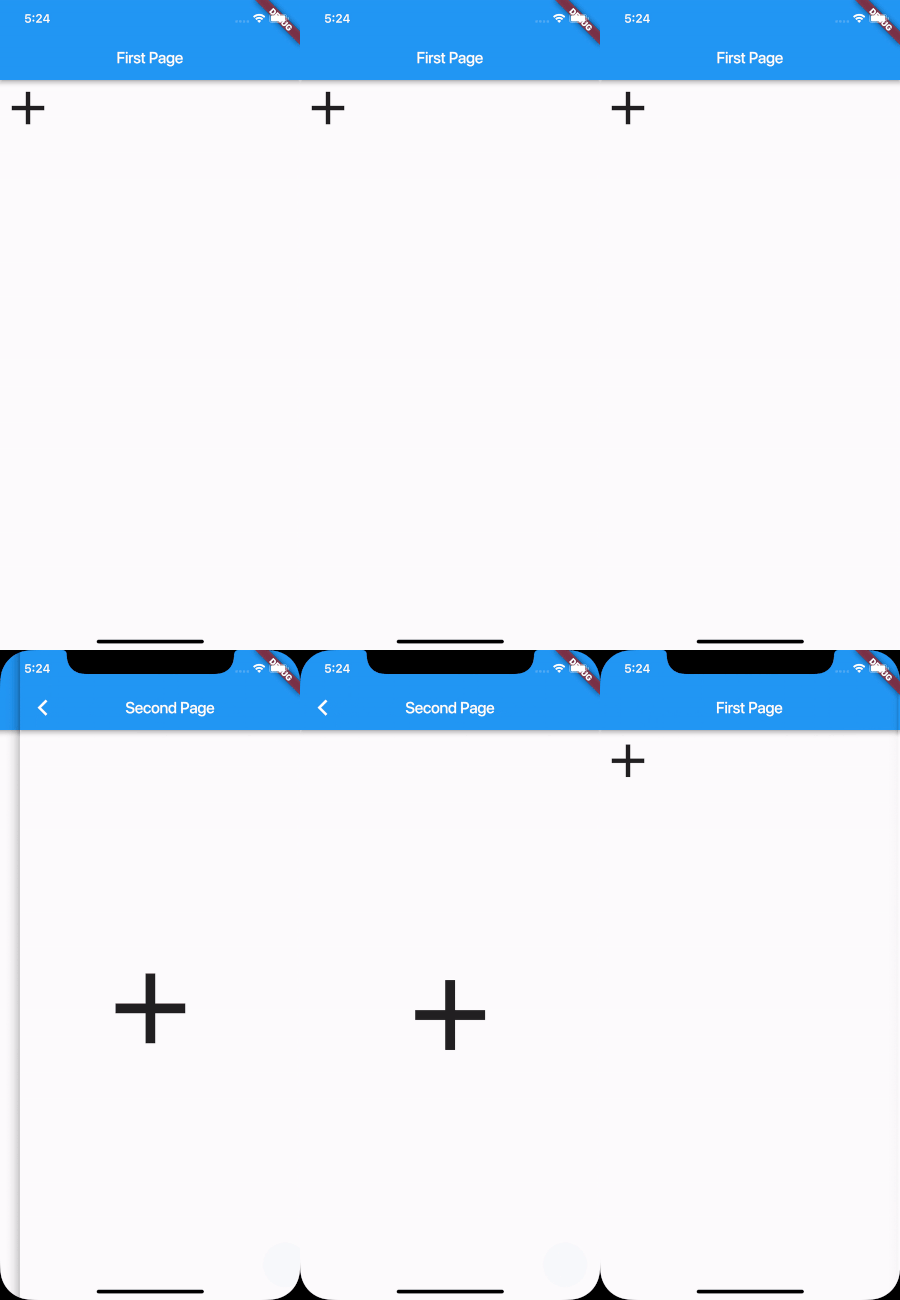
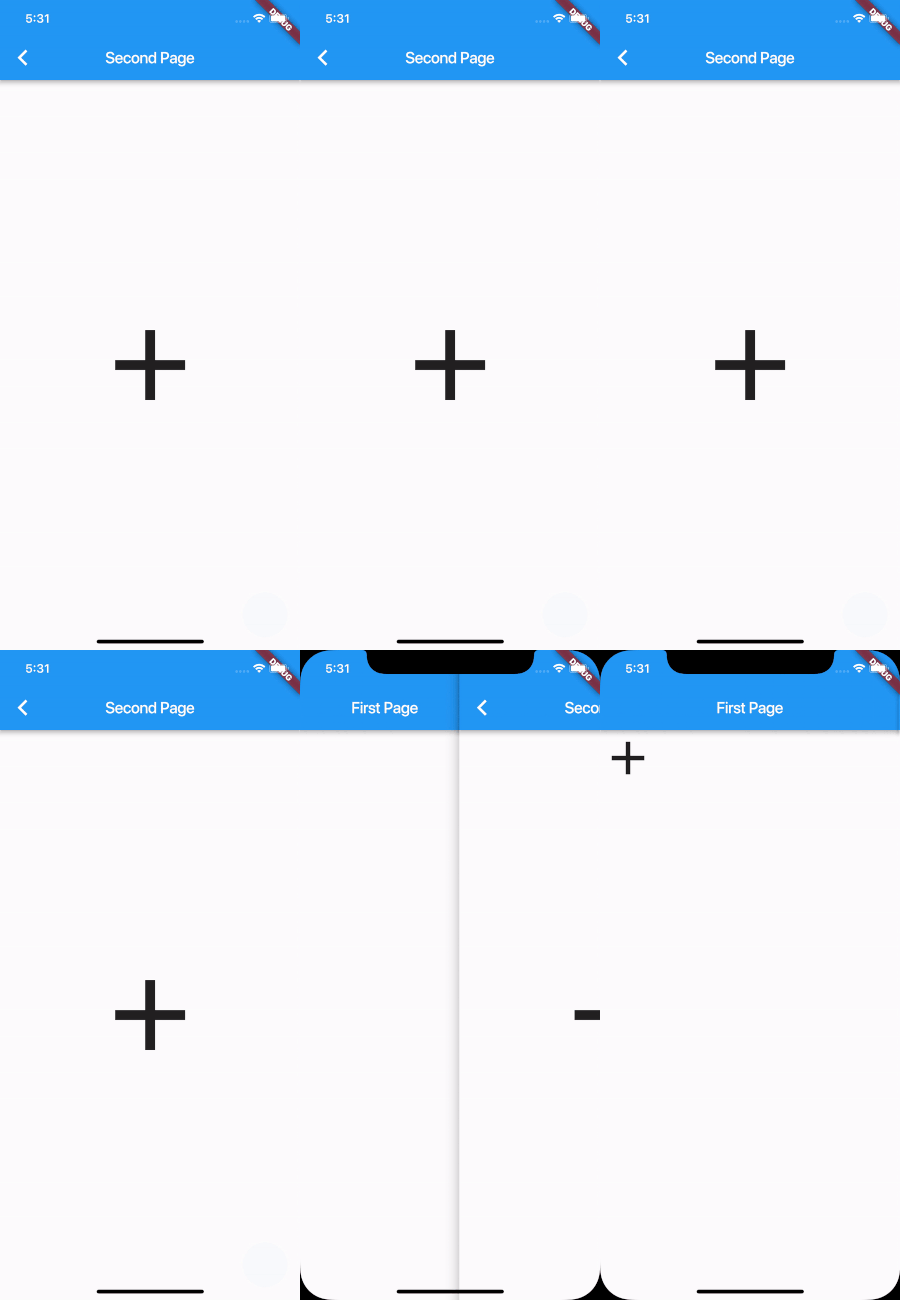
By default, hero animations work when the back button is pressed on iOS but they don’t work on back swipe.
Using back button:
Using back swipe:
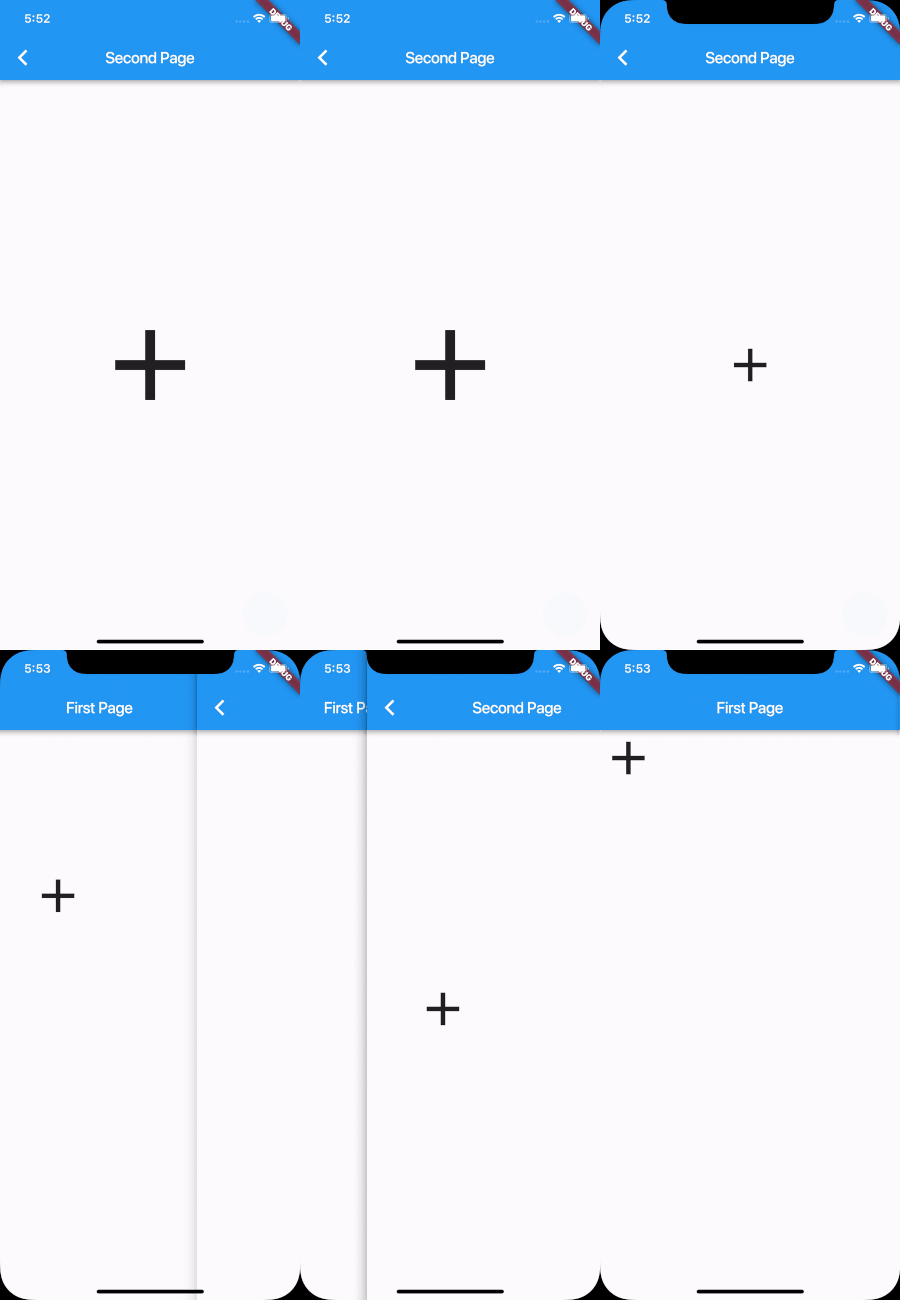
To solve this, simply set transitionOnUserGestures to true on both Hero widgets. This is false by default.
Hero(
  tag: "DemoTag",
  child: Icon(
    Icons.add,
  ),
  transitionOnUserGestures: true,
),
And this will trigger hero animations on back swipe as well.
That’s it for this article! I hope you enjoyed it, and leave a few claps if you did. Follow me for more Flutter articles and comment for any feedback you might have about this article.
Feel free to check out my other profiles and articles as well:
Some of my other articles
Deven Joshi
Google Certified Android Developer. Speaker and Blogger for Flutter and Android. Loves coding, AI and Chess.
Flutter Community
Articles and Stories from the Flutter Community