We have a Vue.js website with some components and routes. Right now, content is defined as simple arrays in components definitions, but that makes adjustments complicated for editors and other non-technical users. It is also uncomfortable for us. Who wants to access FTP or Git to update physical files whenever there is a need for a small content change?
In previous articles I described how to start creating a website, how to select the right front-end framework and how to divide website design into components and make it dynamic and independent. Now it is time to start working with external services. Storing content in the cloud is an essential part of every modern website. Benefits include:
- Administration interface
Nice UX-proof interface for managing content that you do not need to implement on your own. - Flexibility
You can model your content in any structure and reuse even the smallest pieces of data to avoid copy-pasting. - Cloud
You do not need to worry about any aspect of hosting content (including images and media). Just consume it through API. - Scalability
If your website attracts a large amount of visitors, the content service will handle that automatically and your site will remain accessible. - CDN
Some content services leverage a Content Delivery Network to deliver content. This ensures visitors get content from the server that is closest to them. - SDK
Some content services offer frameworks that enable easy consumption of the content. That means we will just call a method to get the right content instead of getting our hands dirty with REST API calls.
And many more. It all depends on the provider of the service.
Headless CMS
This type of content service is called a headless CMS. Headless, because the head of the website is in your application. You decide which services you connect together to form a working modern website. Obviously there are many headless CMS systems out there and you need to select one that fits your requirements. Write them down like I did:
- Store content in my own content models
I have blog posts, about me paragraphs that also require defined order, and in the future maybe some other data types. So I need to be able to define these content models in a variety of ways. - Cloud based
I want to get my website working as fast as possible. Therefore I am looking for a service that is running in the cloud and I just need to sign up and start using it. - JavaScript SDK
My website is built using Vue.js so I need a JavaScript SDK to be able to gather content from headless CMS easily. - Free plan
I am not getting paid for this website so I am trying to keep the big bucks in my pocket.
Although I am not presenting any GDPR sensitive data, nor am I tracking visitor actions, from my experience I know that almost all companies need to think about where they store their content. That is, where the server with their data physically resides. If that is your case, add “hosted in an EU data center” to your list and make sure you select the right headless CMS that allows you to select a European data center.
All of the points mentioned above lead me to Kentico Cloud. It allows great flexibility, is provided as Software-as-a-Service, provides a JavaScript SDKand is free for small projects.
Identifying content models
A content model is like a template for data. If you followed my previous articles you have already created these models when you defined the data of your components. Let’s take a look once again at my Vue.js component for blog posts list.
Vue.component('blog-list', {
 props: ['limit'],
 data: function(){
  return {
   articles: [
    {
     url: 'https://medium.com',
     header: 'How to start creating an impressive website for the first time',
     image: 'https://cdn-images-1.medium.com/max/2000/1*dVlw9tLq4lVaXrGG0gZc8Q@2x.png',
     teaser: 'OK, so you know you want to build a website. You have an idea how it should look like and what content it should display. You are sure that it should be fast, eye-pleasing, gain a lot of traction, and attract many visitors. But how do you create that? What are the trends around building websites these days? How are others building successful websites and where should YOU start? Let’s give you a head start!'
    },
    …
   ]
  }
 },
 template: `
  <section class="features">
   <article v-for="article in articles">
    <a :href="article.url" class="image">
     <img :src="article.image" alt="" />
    </a>
    <h3 class="major">{{article.header}}</h3>
    <div v-html="article.teaser"></div>
    <a :href="article.url" class="special">Continue reading</a>
   </article>
  </section>
 `
 });
Note the array of articles. Every article has following fields:
- URL
- Header
- Image
- Teaser
These are the fields that define my ‘Blog post’ content model. We always need to tell the headless CMS which form we want to store the content. There is also one additional field, Published, that is not mentioned in the list above as it is not directly displayed on my website. However, I need to use that field for ordering blog posts as my homepage lists the top 4 newest articles.
I logged into Kentico Cloud and switched to Content models tab, I defined my Blog post content model this way:

You see that there are two fields for image. I wanted to have the ability to either store the blog post image directly in the headless CMS or reference an image on a 3rd party server. I added fields for both and based on which field contains a value I will display image on live site.
Adding the data
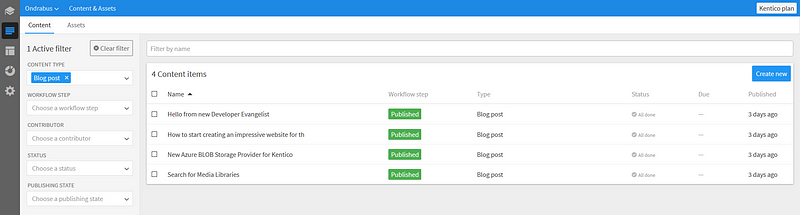
Once the content model is created, it’s time for adding content. On the Content & Assets tab I added four blog posts that are published on various channels:
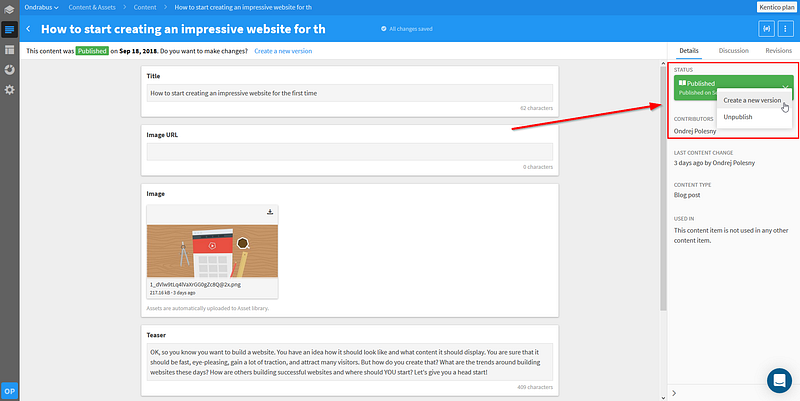
In my project (and it is also the default setting) all content items are assigned to the default content workflow allowing me to work on them without accidentally publishing draft content on my site. In the meantime I have published all of the blog posts, so when I open detail of any of them, they can not be directly changed. Instead, I can create a new version of the content which allows me to edit, but still keep the published version live until I’m ready to publish again. Alternatively, it is possible to unpublish the content item and work on it directly.
Consuming data using API
Let’s get back to code. As I mentioned before, Kentico Cloud offers a JavaScript SDK which makes consuming the content very easy. Add the following tag right before the components.js and app.js files. We do not need to add the SDK’s library into the <head> section as we need it only for the Vue.js components.
<script type="text/javascript" src="https://unpkg.com/kentico-cloud-delivery@latest/_bundles/kentico-cloud-delivery-sdk.browser.umd.min.js"></script>
The SDK contains DeliveryClient class which provides the content from Kentico Cloud. Instantiate it in components.js right before the definition of the very first component:
var deliveryClient = new DeliveryClient({
 projectId: '{your project ID}'
});
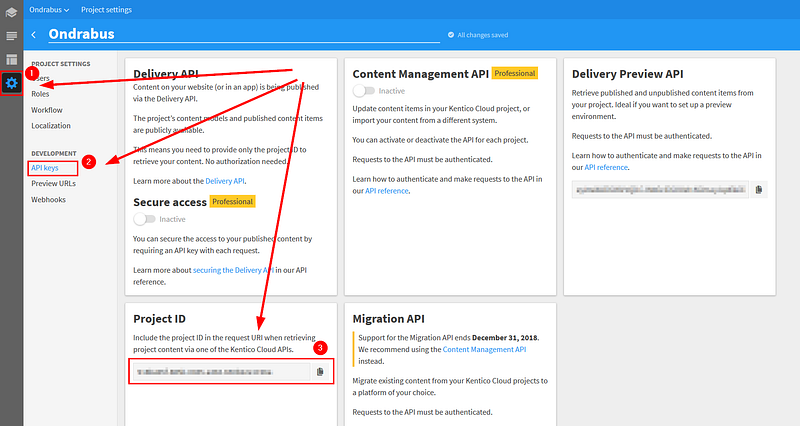
You will find your project ID in Kentico Cloud on the Settings tab.
Previously I showed you how I designed my Blog content model and how I created a few Blog content items. Therefore I will also show you how to gather these posts into my Blog list component.
First of all, we no longer need the data to be defined in an array within the component data bucket. Instead, we can leverage the created function that is invoked by Vue.js automatically whenever the component is created. In that function, we can instruct the deliveryClient to get the right content for this component. The implementation can look like this:
created: function(){
 var query = deliveryClient
  .items()
  .type('blog_post')
  .elementsParameter(['link', 'title', 'image_url', 'image', 'teaser'])
  .orderParameter('elements.published', SortOrder.desc)
  .getPromise()
  .then(response =>
   this.$data.articles = response.items.map(item => ({
    url: item.link.value,
    header: item.title.value,
    image: item.image_url.value != '' ? item.image_url.value : item.image.assets[0].url,
    teaser: item.teaser.value
   }))
 );
}
At the start I defined that I want to get items of type blog-post. That is the code name of Blog content model that I defined earlier. You can find it in content model editing window under hash:

Then I specified all the fields I wanted to use. This is an optional step, but I always do it as it ensures the response will be minimal in size — it will only contain data elements I use in respective components. You can find code names of fields under the same hash button displayed on each field.
Next, I ordered the blog posts by their published date as I want the newest ones at the top of the page. Note that this publishing date is just another field of the Blog content model and I need to specify it for each blog post. Date and time when the content item was published in Kentico Cloud is not relevant in this case.
Finally, I got the Promise object. The Promise object enables delayed resolving. You see, the deliveryClient needs to construct the REST API call internally and gather the content from cloud. That is why we need to wait a little while before further processing. Promise allows us to do that with the .then() method. In there I needed to provide a mapping function from the Kentico Cloud object to the Article object as I had defined earlier in the static array. I need to do this mapping as my template is built on top of the Article object definition. This implementation ensures that the old array of articles is now replaced with dynamic content gathered from Kentico Cloud.
Limiting content items
Perhaps you noticed that I am using the Blog post component on two of my pages — Home page and Blog page. On the Home page there are only the 4 latest blog posts displayed, but I show all of them on the Blog page. That is why I previously introduced the Limit property on Blog list component.
Vue.component(‘blog-list’, {
 props: ['limit'],
 data: function(){
 …
The implementation of created function displayed above is not respecting this property yet, so I need to make a little adjustment:
created: function(){
 var query = deliveryClient
  .items()
  .type('blog_post')
  .elementsParameter(['link', 'title', 'image_url', 'image', 'teaser'])
  .orderParameter('elements.published', SortOrder.desc);

  if (this.limit)
  {
   query = query.limitParameter(this.limit);
  }

  query
  .getPromise()
  .then(response =>
  …
The rest of the code will be the same. Take a look how easy it is to work with content delivery using the JavaScript SDK. No need for complicated REST API calls, just define what you want and how you want to process it.
Nested content and defined order
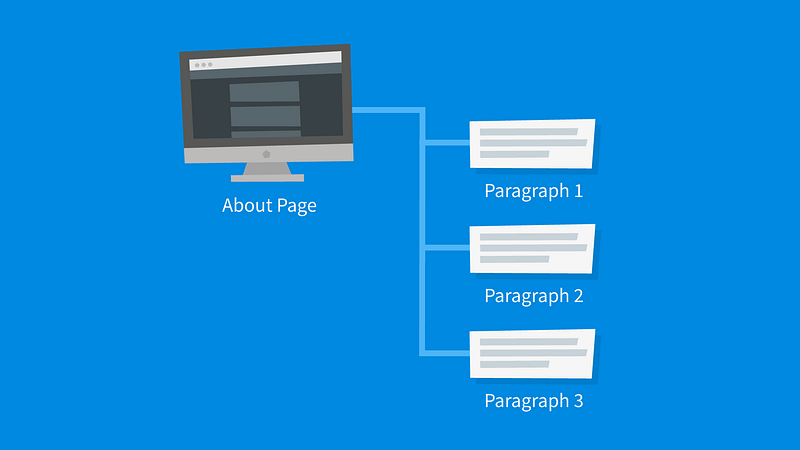
If you start working with a headless CMS, you will quickly stumble upon a content structure where you need to define the order of items that is not related to any field or timestamp. It was About page in my case. There are three little paragraphs that have defined order, but they need to be added separately as I may need to add/remove them in the future.
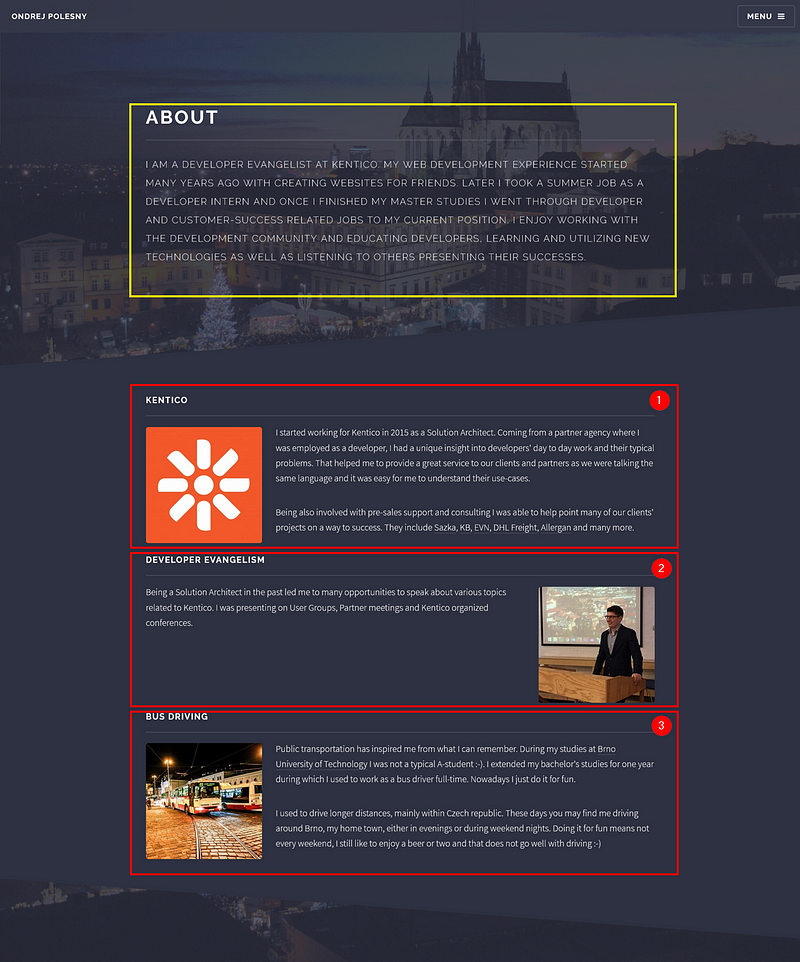
Also note the yellow highlighted area. This text appears on the About page only and I need to be able to adjust it from the headless CMS too. Therefore I decided to use the following structure:
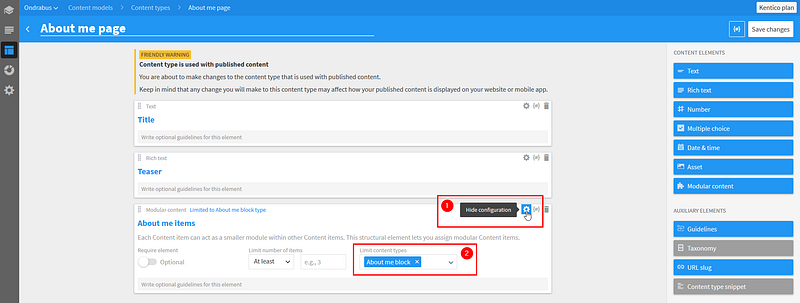
When you want to create a structure like this, you will find the Modular content field type very useful. It enables you to add items within other items, that is nest them. My About page contains two simple fields — title and teaser — that you see in the yellow area above. The third field — About me items — is of type Modular content and serves as a container for child content items. By default, editors can add content items of any type into this field. In my case, that is not desired, so I configured the field to only allow About me blockcontent items. The About me block content model contains title, text and imagefields.
Let’s also take a look at how the actual content item of type About me pagelooks like:
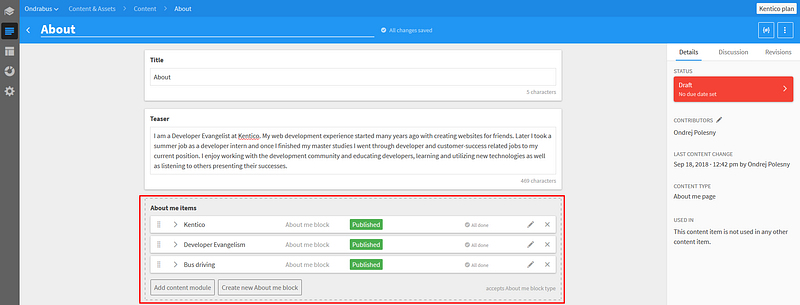
All three paragraphs are now added into this field as child content items. They can be easily reordered using drag & drop, removed, or new items created. The order of these items represent the same order in which the items will be delivered by the deliveryClient.
The template of the component displaying these paragraphs will be very similar to the blog posts component. I will focus on the implementation of the created function.
created: function(){
 deliveryClient
  .items()
  .type('about_me_page')
  .elementsParameter(['title', 'teaser', 'image', 'about_me_items'])
  .depthParameter(2)
  .getPromise()
  .then(response =>
   this.$data.articles = response.items[0].about_me_items.map(item => ({
    header: item.title.value,
    teaser: item.teaser.value,
    image: item.image.assets[0].url
   }))
  );
}
The delivery client now delivers only items of type about_me_page. However, note the depthParameter specification. This way I am telling the deliveryClient that it should also obtain children of top level items. In the mapping function see that I am not working with the top level item (response.items[0]), but rather with its children (response.items[0].about_me_items). That way I get the paragraphs of About me block items.
Data inputs
The use of the deliveryClient enables us to gather content from Kentico Cloud easily. All the operations I described up to now were focused on creating content within the headless CMS Kentico Cloud and displaying it on a live site. You see that the JavaScript SDK makes it really easy to gather the right content for each component and enables further processing of data. Wiring Vue.js with the deliveryClient makes creating dynamic components really enjoyable as it all just works without spending hours and hours of development on it.
On most websites there are also components that enable visitors to input data, like contact forms. In my next article I will show you how to solve this task. And again, without spending a penny!
Other articles in the series:
- How to start creating an impressive website for the first time
- How to decide on the best technology for your website?
- How to power up your website with Vue.js and minimal effort
- How to Mix Headless CMS with a Vue.js Website and Pay Zero
- How to Make Form Submissions Secure on an API Website
- Building a super-fast and secure website with a CMS is no big deal. Or is it?
Written by
Ondřej Polesný
Web development enthusiast with passion for anything new and intriguing. Developer Evangelist, Solution Architect, Developer. Tell me what are your struggles.
freeCodeCamp.org
Stories worth reading about programming and technology from our open source community.