On the Google I/O ’17 Google introduced us Flutter — a new open source library for creating mobile applications.
As you may know, Flutter is a solution for creating cross-platform mobile applications with beautiful UI. Flutter’s way of designing views is similar to the web applications, so you can find many analogies to HTML/CSS.
Accordingly to their promises:
Flutter makes it easy and fast to build beautiful mobile apps.
Sounds great, but at first look, I wasn’t very convinced about another cross-platform solution. We have many of them — Xamarin, PhoneGap, Ionic, React Native and so more. We all know that there are many options and all of them have some pros and cons. I wasn’t sure if Flutter will be something different from them. But I got surprised.
Flutter has many features that can be very interesting from the Android developer point of view. In this article, I’d like to show you some of the things that really involved me. So let’s start!

Why Flutter?
You may be curious and ask yourself a question:
“What’s so innovative about Flutter? How does it work? How is Flutter different from React Native?”
I’ll not cover technical topics here, as it was done much better by the other people. If you’re interested in how Flutter works in details, I encourage you to read this article: What’s Revolutionary about Flutter? You can also check wrap-up of Flutter concepts in “The Magic of Flutter” presentation.
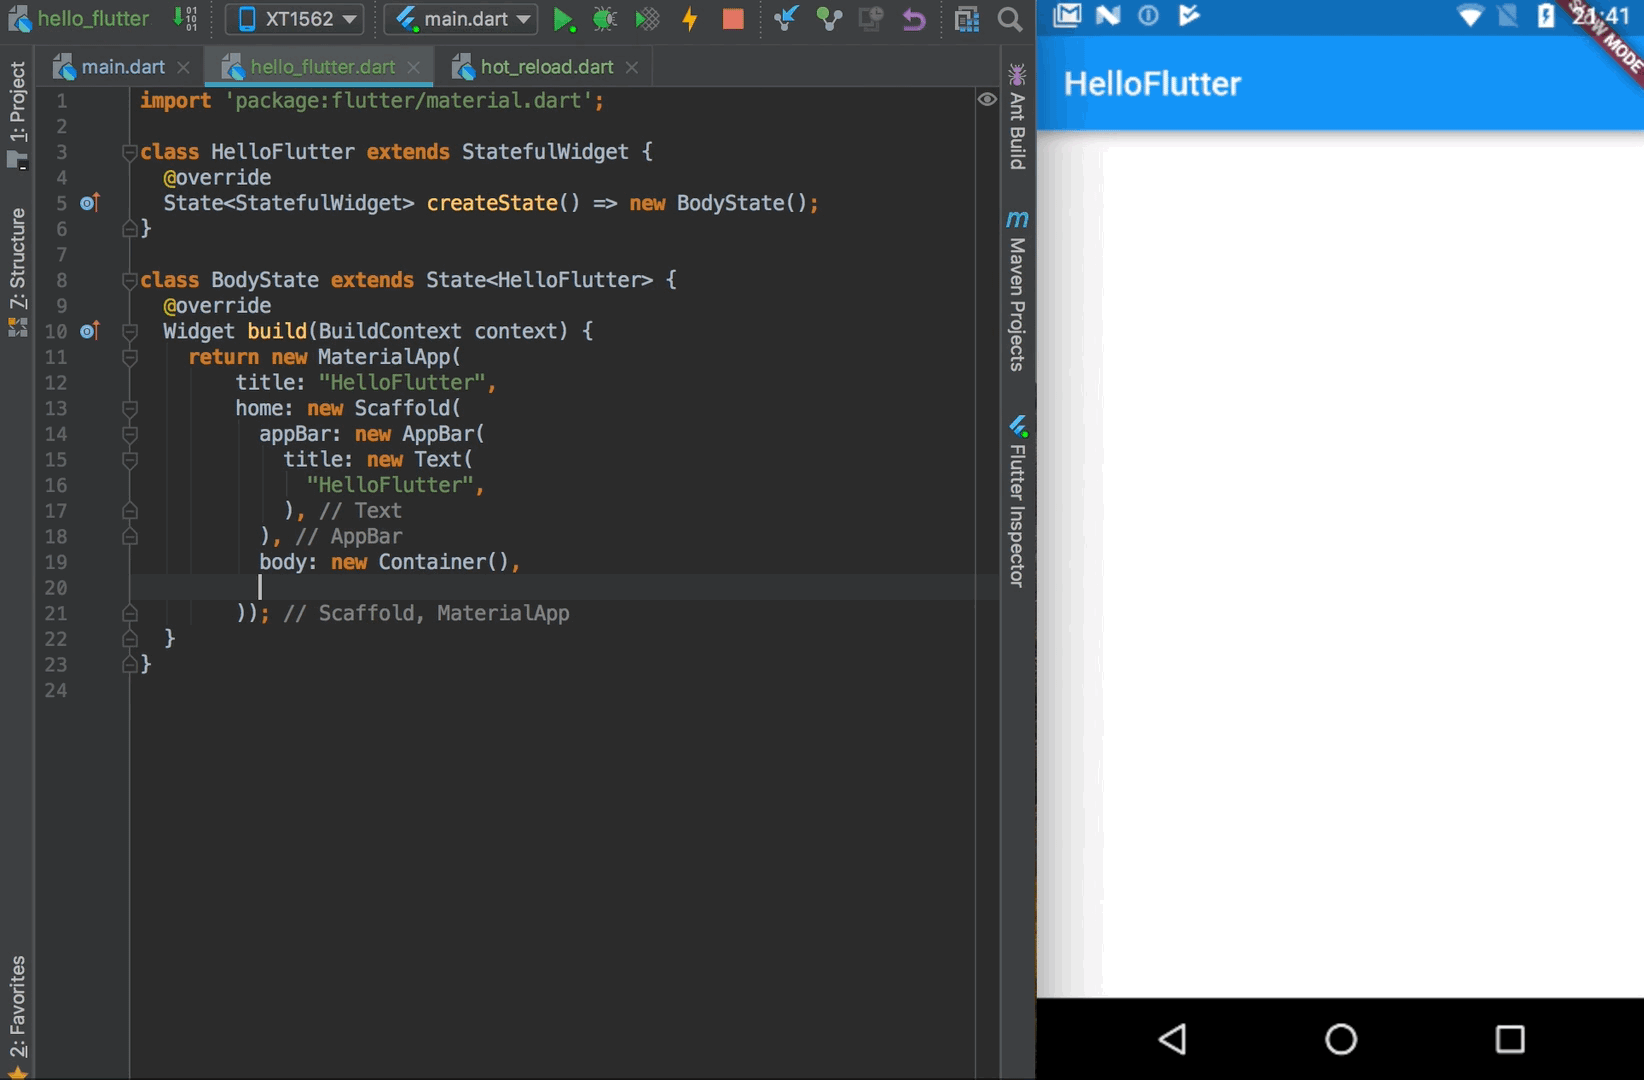
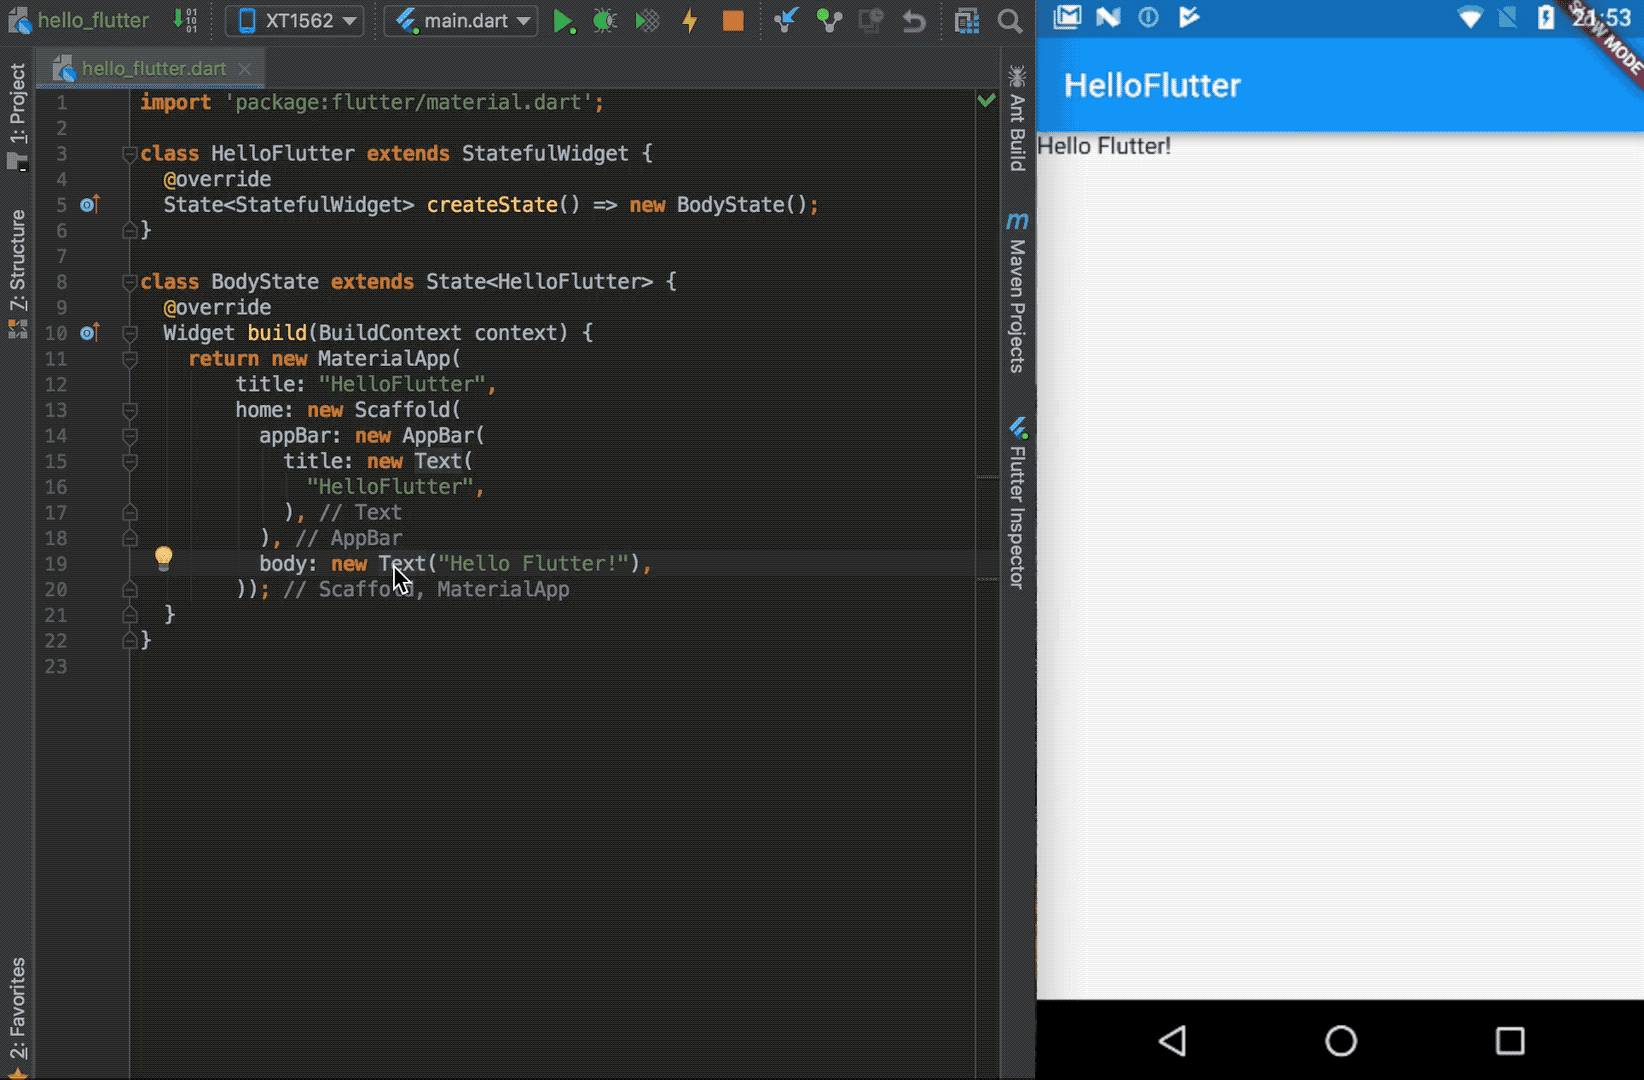
In the shortcut, Flutter is a mobile SDK that allows us to create cross-platform mobile applications (so you can write one code and run the app both on Android and iOS). You write code in Dart, a language developed by Google, which looks very familiar if you used Java before. Instead of XML files, you build layout tree like this:
import 'package:flutter/material.dart';

class HelloFlutter extends StatelessWidget {
  @override
  Widget build(BuildContext context) {
    return new MaterialApp(
      title: "HelloFlutter",
      home: new Scaffold(
        appBar: new AppBar(
          title: new Text("HelloFlutter"),
        ),
        body: new Container(
          child: new RaisedButton(onPressed: _handleOnPressed),
        ),
      ),
    );
  }
}
As you can see, a layout is built from components (Widgets) that are nested. The core Widget is MaterialApp (that’s the whole application), then we have Scaffold (that’s the main layout structure), and then inside we have AppBar(like Android Toolbar) and some Container as body. Inside body, we’ll put our layout Widgets — Texts, Buttons, etc.
That’s just the cut-off. If you’d like to read more about layouts, check Flutter’s tutorial on building layouts.
#1 Hot reload
Okay, now let’s begin!
We’ll start with the basic application. We have three buttons, every one of them changes text color:
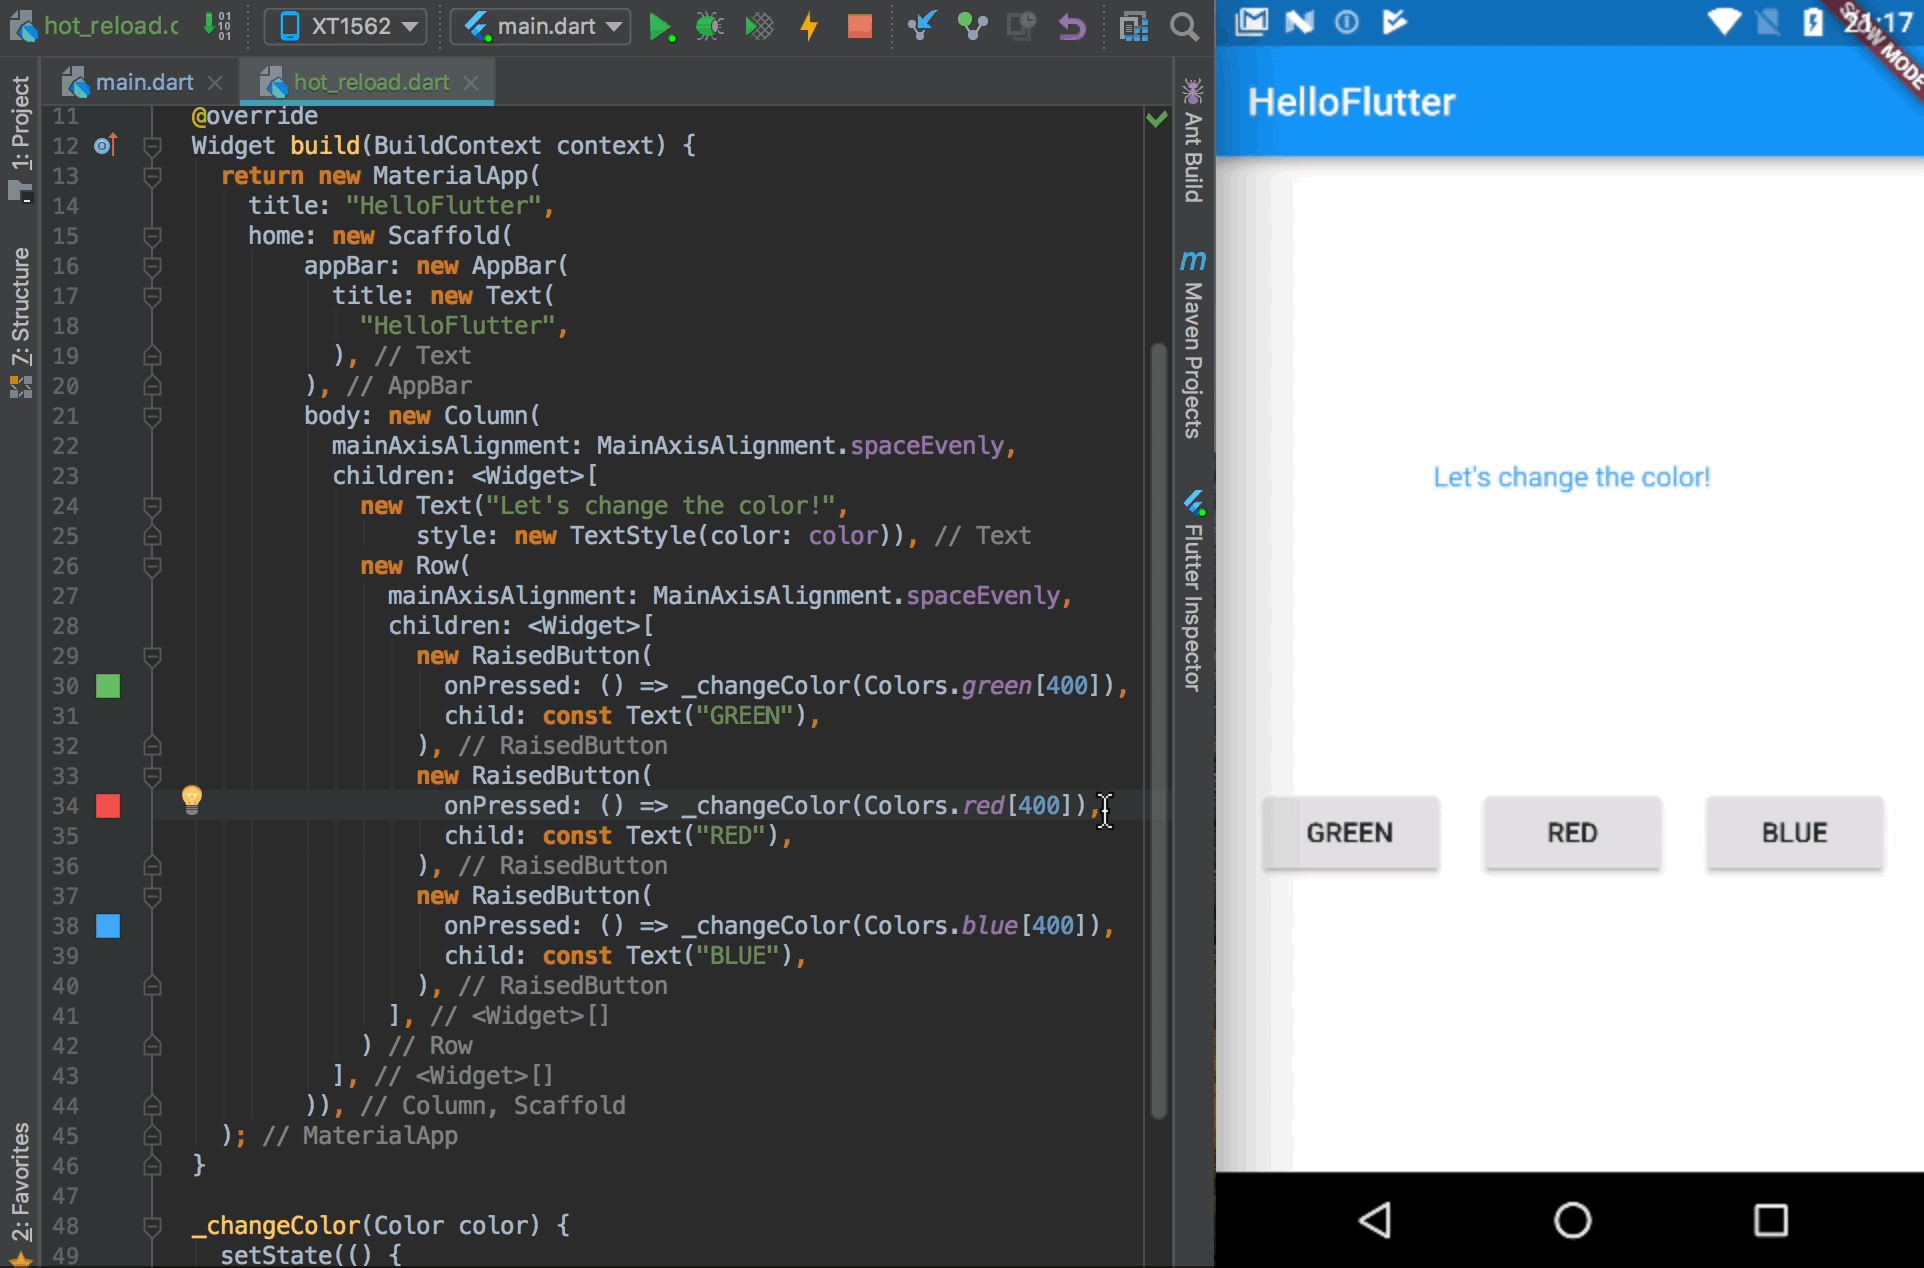
Now, we’ll use one of the coolest feature — Hot reload. It allows you to instantly rebuild your project as if it was just a web page. Take a look at the Hot reload in the action:

What do we do here? We change something in the code (e.g. the text on the button), then we click “Hot Reload” (at the top of the IntelliJ IDE) and we’ll see the result in seconds. Cool, isn’t it?
Hot reload is not only fast but also smart — if you have some data displayed already (as the color of the text in this example), you can change UI during application runtime and if you hot reload app: they’ll remain the same!
#2 Full set of (Material Design) widgets
Another great thing about Flutter is that we have a very rich catalog of a built-in UI components. There are two sets of widgets — Material Design (for Android) and Cupertino (for iOS). You can choose and easily implement whatever you want. You’d like to create new FloatingActionButton? Here you go:
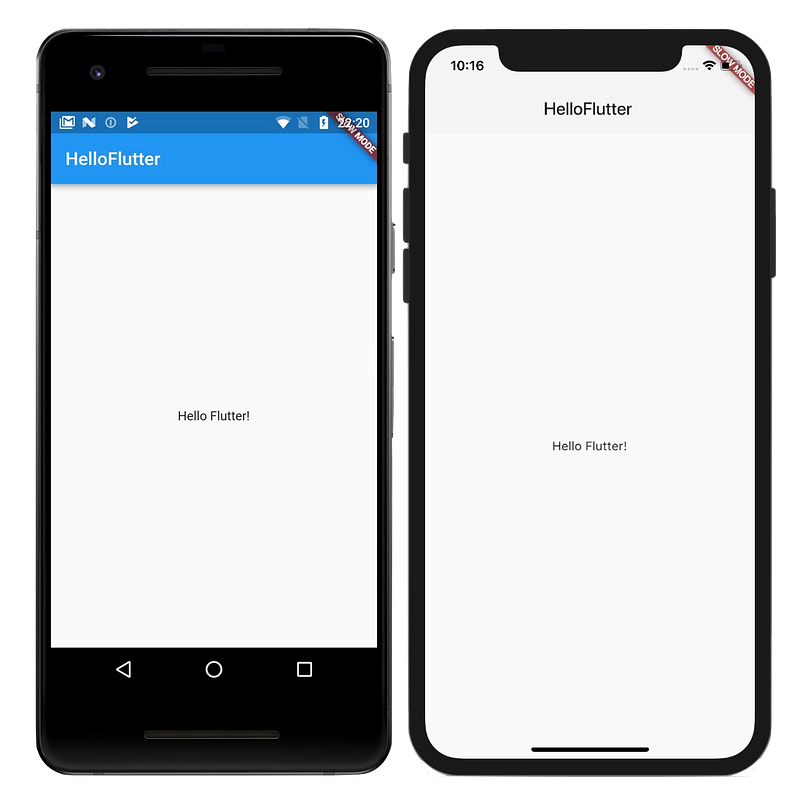
And the best thing is that you can implement every widget on every platform. If you implement some Material Design or Cupertino widget, it’ll look the same on every Android and iOS device. You don’t need to worry that something will look different across many devices.
#3 Everything is a Widget
As you saw in the previous gif, creating UI is very easy. It’s possible thanks to the core principle of Flutter, where everything is a widget. Your app class is a widget (MaterialApp), your whole layout structure is a widget (Scaffold), and basically, everything is a widget (AppBar, Drawer, SnackBar). Do you want your view to be centered? Wrap it (Cmd/Ctrl + Enter) with Center widget!
Thanks to this creating UI is as simple as composing layout with many different small parts.
It’s also connected with another core principle — in Flutter composition is over inheritance. It means that if you’d like to create some new widget, instead of extending Widget class (as you’ll do in Android by extending some View class), you instead compose new Widget with few small Widgets.
#4 Different themes for Android/iOS
Usually, we want our Android application to look different than an iOS app. Differences are not only in colors but also in dimensions and styles of widgets. We can achieve this in Flutter with themes:
As you can see, we set different color and elevation for Toolbar (AppBar). We do it using Theme.of(context).platform parameter to get current platform (Android/iOS):
import 'package:flutter/material.dart';

class HelloFlutter extends StatelessWidget {
  @override
  Widget build(BuildContext context) {
    return new MaterialApp(
        title: "HelloFlutter",
        theme: new ThemeData(
            primaryColor:
                Theme.of(context).platform == TargetPlatform.iOS
                    ? Colors.grey[100]
                    : Colors.blue),
        home: new Scaffold(
          appBar: new AppBar(
            elevation:
                Theme.of(context).platform == TargetPlatform.iOS
                    ? 0.0
                    : 4.0,
            title: new Text(
              "HelloFlutter",
            ),
          ),
          body: new Center(child: new Text("Hello Flutter!")),
        ));
  }
}
#5 Many, many, many packages
Although Flutter is still in alpha version, the community is really big and involved. Thanks to this Flutter has the support of many packages (libraries, just like Gradle dependencies in Android). We have packages for opening images, making HTTP requests, sharing content, storing preferences, accessing sensors, implementing Firebase, and many more. Of course, everyone supports both Android and iOS.
How to start?
If you liked Flutter and want to try it on your own, the best idea is to start Google Codelabs:
- in this one, you’ll get the basics of creating layouts: Building Beautiful UIs with Flutter
- and if you’d like to try more of Flutter, you must try Firebase for Flutter
After those codelabs, you’ll make a simple and beautiful Chat message application. You can check my implementation of this app on my GitHub:
SOURCE: https://hackernoon.com/flutter-5-reasons-why-you-may-love-it-55021fdbf1aa
Written by
Paulina Szklarska
Android Developer @DroidsOnRoids / GDG & WomenTechmakers Wrocław Lead / co-organizer of Toast Wroclaw meetup / blogger / speaker / cat owner / travel enthusiast
Hacker Noon
how hackers start their afternoons.