Creating interactive infographics with plain Javascript (Part-four)
Recap
This article is a five-part series on creating interactive infographics with plain Javascript.
Previously we designed a two-way map locator to enhance user-navigation. In this article, we’ll continue to base our UI example on Google Cloud Platform (GCP) products to present content that has a sophisticated architecture.
Watch how we can make product information easy to use.
Objective
Let’s design a UI to present multifaceted content.
Introduction
There is an advantage in organising information as a hierarchy. You can categorise and step through topics to reveal meaningful relationships.
For example, on a knowledge portal, a zoologist may be interested in a topic concerning Jack Russells. She’s going along a specific information path:
Animals > Mammals > Carnivore > Canis > Dogs > Jack Russells
Suppose she’s also studying on Huskies, Hyenas, and Foxes. What is a good way to represent connected information vis-a-vis Jack Russells? How to provide contextual information without overwhelming the user with a data dump?
One approach is to break up data into small segments and reconnect them across multiple standalone pages. With every page load, users jump through new categories and webpages to find more details. However, it becomes harder to highlight contexture relationships. Too many page loads may also disorientate or frustrate users. The result is degraded user experience.
There’s got to be a better way to guide users towards their goals. One part of that equation is solved in our previous discussion. We can put an entire map, or animal kingdom, onto a canvas and still navigate gainfully.
We’re now left with the “Jack Russell” problem — the design challenge of getting the UI to display detailed content one level down without affecting information flow.
Concept
Think of extending an information pathway (of a node) as adding an HTML container. Like using post-it notes, we can “paste” these containers onto a browser window to reveal layered information. No page load is required. We’ve basically described an inline UI.
Now comes the exciting part. When a visitor “hop” from one node to another, these containers swaps in and out to show updated content. We’ll show users what’s going on by animating the UI.
Users can now access detailed content without losing the big picture. Best yet, they are always on top of a consistent and persistent UI.
Tips: If you are writing a Single-Page-Application (SPA) such as React or Angular, create the best user experience by hydrating the routes dynamically. For example, when a user clicks on a backlink that takes her directly to the route animalchart.com/jack-russells, the SPA should pull the relevant data, auto-focus on the node, and fire off the animation without having the user to do anything.
Getting started
Implementation is straightforward.
- The post-it note mechanism is merely a div container that is created or destroyed at runtime.
- Animation is plain CSS with easing effects.
- Data store reuses the
legend[]array (from part-one discussion).
Step 1: Prep the canvas
Add a click listener to the main while loop (part-one discussion).
while (item[i]) {
    ...
    itemElementName[i].addEventListener("click", showLayeredContent)
}
- Add a
clicklistener to each node. clickwill trigger a custom functionshowLayeredContent.
showLayeredContent runs instructions to:
- Retrieve data from
legend[]. - Create a div container for displaying content.
- “paste/stick” the container onto the browser window or
canvas. - Stage the container’s initial position “below” the viewport so that it’ll be ready to “slide up” once activated.
function showLayeredContent(event) {

    var div = document.createElement('div');
    div.id = "some HTML" + deepContent;
    //  add your CSS
    //  add your animation
    // attach the new container to the DOM
    document.body.appendChild(div);
    //  ... add animation to show what's going on

    anotherLayeredElement(this.id);
    //  ... more "post-it notes", if any
}
document.createElement(‘div’)creates the “post-it note” container dynamically.div.id = “some HTML” + ‘deepContent’populates the container.deepContentcontains the actual content. Usethis.idas the index key to retrieve records from thelegend[]datastore.document.body.appendChild(div)appends the container to the DOM for rendering.document.bodyis generic. Usecanvasor your own container element.anotherLayeredElement(this.id)adds more containers. In our demo video, we used a total of 3 “sticky” containers.
Tip 1: Dynamically generate the container element and its CSS so that we can quickly adapt the engine to other projects.
Tip 2: Remember to remove the old containers before swapping in new ones.
Step 2: Guide user actions with animation
Position the first “sticky” container to the right as a full height element. It’s entrance is animated in a bottom-to-up motion.
var sticky01 = document.getElementById( myContainerID );
//  Stage the container's pre-animation position
sticky01.style.bottom = "-100vh";
sticky01.style.right = "0%";
//  Attach CSS class to the RHS container.
sticky01.classList.add("myCssClass");
//  Once your container is ready, animate its entrance.
sticky01.style.transform = "translateY(0px)";
...
sticky01references the first container
Tip: Change translateY to translate3d to take advantage of hardware acceleration for improved performance.
layeredContainerRHS {
    position: fixed;
    overflow-y: scroll;
    top: 0;
    right: 0;
    width: 50vw;
    height: 100vh;
    zIndex: 9;
    transition: all 200ms cubic-bezier(0.165, 0.84, 0.44, 1);
}
position: fixed“sticks” the container onto thecanvasUI.overflow-y: scrollmakes it possible to display unlimited content via vertical scrolling.top: 0sets the pre-entrance position of the container “below” the canvas.right: 0,width: 50vwandheight: 100vhstyles the container to occupy the right side of the browser window.zIndex: 9assigns the layering order.transitioncreates the animation effect.cubic-bezierproduces a silky smooth motion.
Step 3: Add multiple “sticky” containers

So far we’ve created a full-height “sticky” container to display detailed information. Meanwhile, users can still browse other topics.
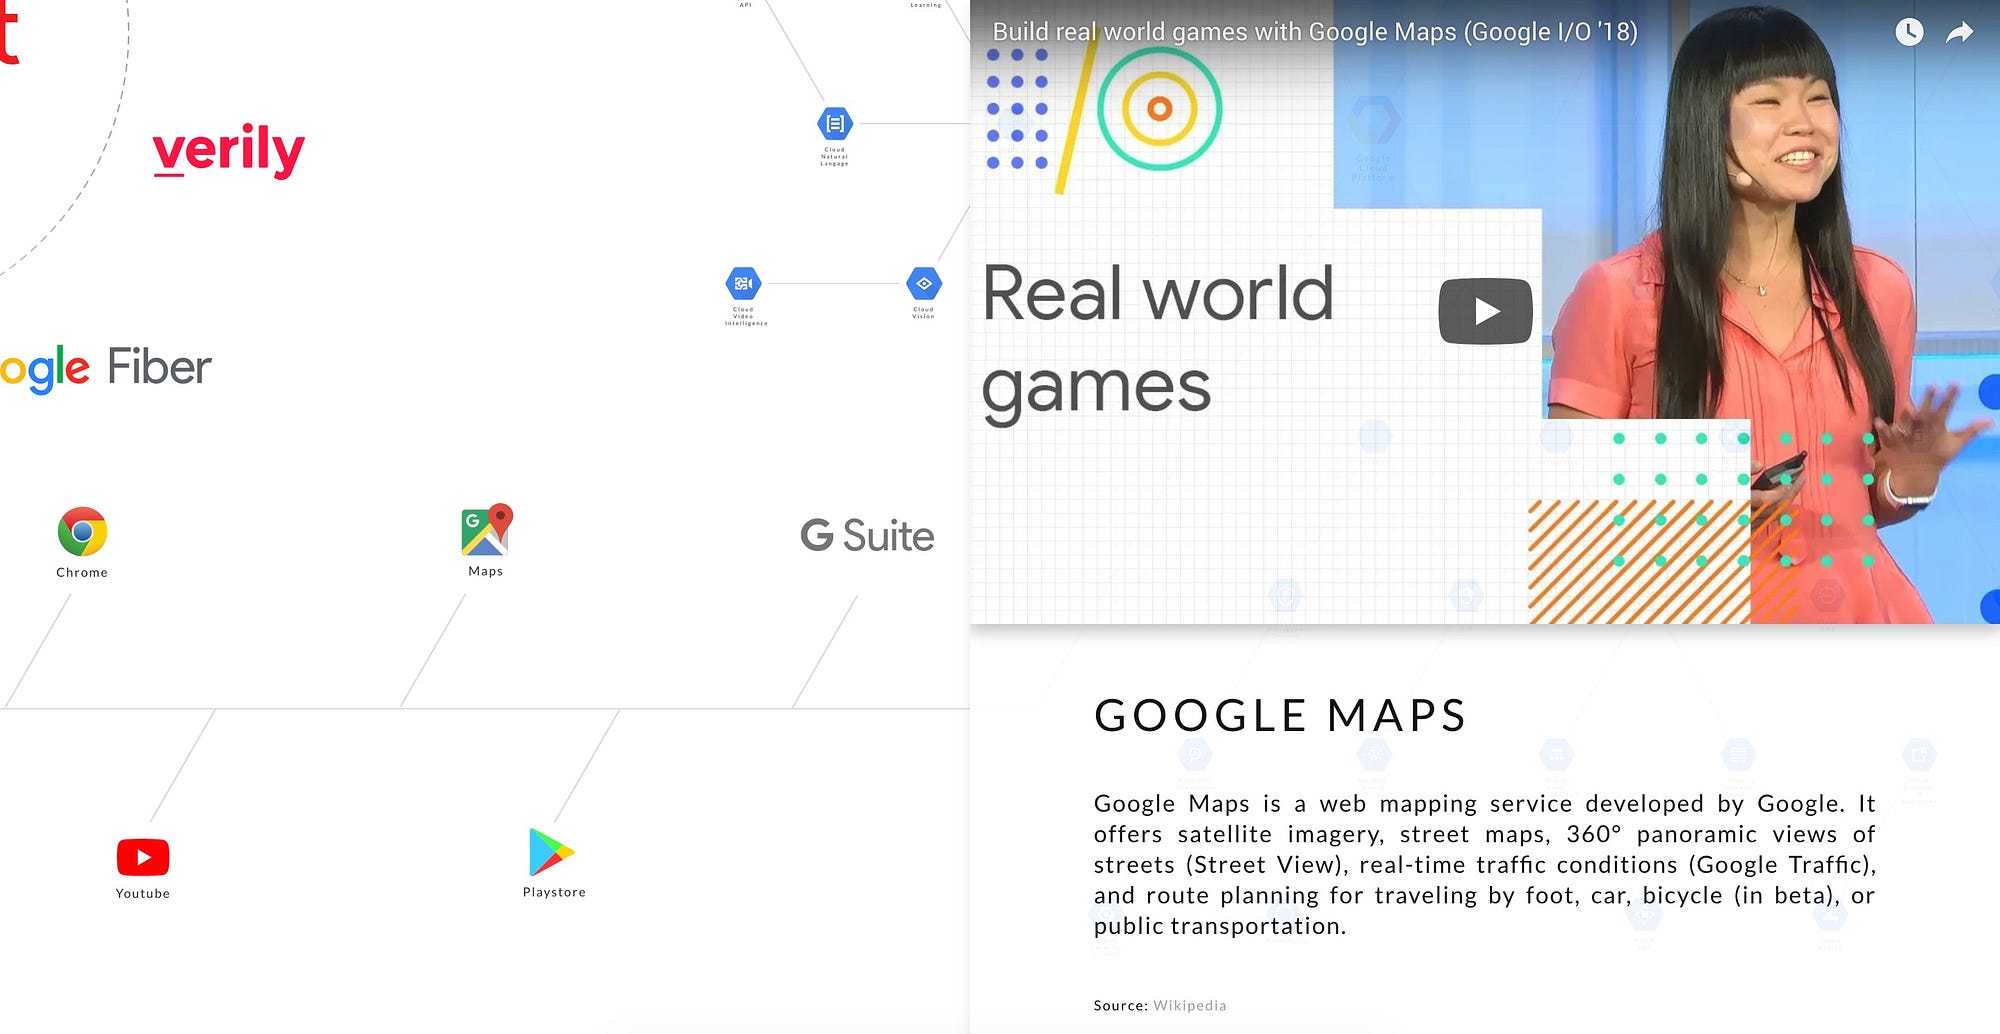
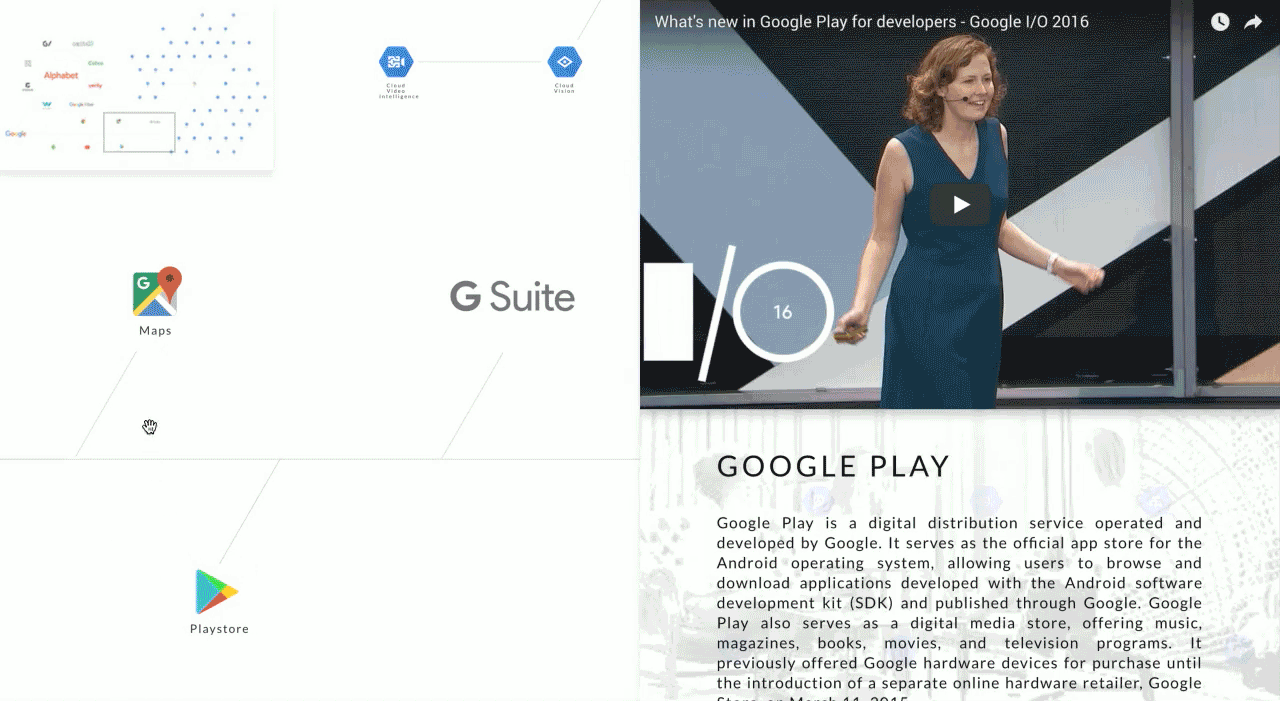
If you wish to tier information into more layers, simply add more containers. In our demo video, we’ve added two smaller containers to show summary information:
- An “middle” container for a summary text and feature images.
- A “left“ container to highlight relevant information, references, or links to external resources. In our example, we used it to reveal a flowchart.
function middleSticky(ID) {
    ...
    // "middle" sticky container (#02)
    div.style.left = "25vw";
    div.style.height = "44vh";
    div.style.width = "30vw";
    div.style.background = "#000";
    ...
    middleSticky.style.transform = “translateY(0vh)”;
    ...
}
function leftSticky(ID) {
    ...
    // "left-most" sticky container (#03)
    div.style.left = "0vw";
    div.style.height = "21vh";
    div.style.width = "25vw";
    div.style.background = "#e68717";
    ...
    leftMostSticky.style.transform = “translateY(0vh)”;
    ...
    }
translateY(0vh)initiates the starting animation positions:- Differentiate each container with CSS.
Step 4: Clean up
Once the zoologist is done with any topics, the UI closes the sticky containers to maximise the main navigation UI. In reverse order, “Slide down” the sticky containers and remove it from the DOM behind the scene.
function closeStickyWindows(id){
    div.style.transform= "translateY(0vh)";
    setTimeout(() => {
        div.parentNode.removeChild(div);
    }, 500);
}
500e.g. (last animation starting at 300ms) + (200ms to complete the animation).div.parentNode.removeChild(div)removes the DOM element (i.e. garbage collection). Use.remove()if ES6 backward compatibility is not an issue.
Next Steps
Users can browse content in a more granular manner.
In the final part of the series, we’ll talk about ideas that gives UIs a human touch.
SOURCE: https://hackernoon.com/how-to-create-a-progressive-ui-to-enhance-presentation-cc42fe97360c
WRITE BY